Category: Nutrient and cllinary

  • Injeolmi Bingsu: Snow-Soft Korean Milk Shaved Ice with Sweet Roasted Soybean Powder

    Injeolmi Bingsu: Snow-Soft Korean Milk Shaved Ice with Sweet Roasted Soybean Powder

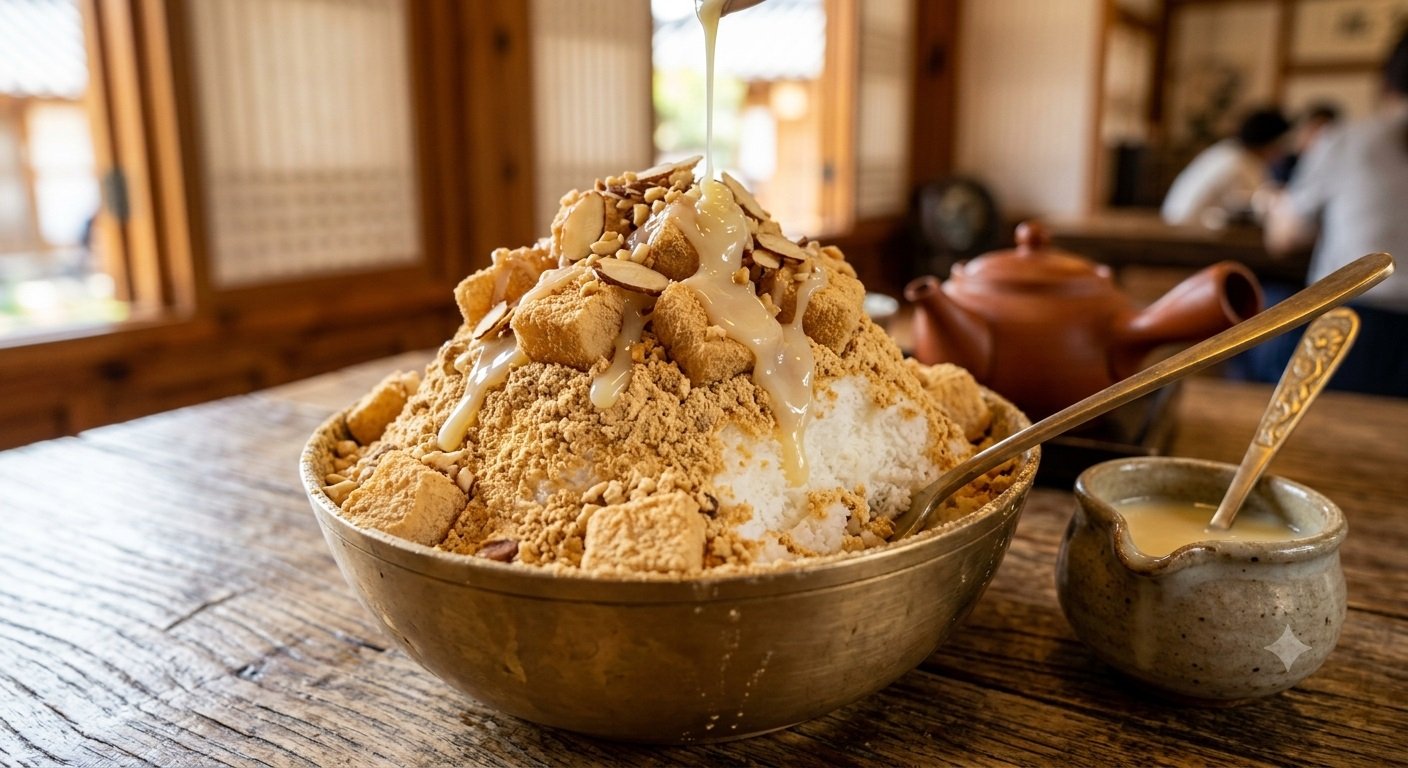
    One spoonful of Injeolmi Bingsu feels like eating a sweet cloud: delicately shaved milk ice, nutty roasted soybean powder, chewy rice cake, and a drizzle of condensed milk. This beloved Korean dessert is the ultimate warm-weather treat, balancing creamy richness with the earthy flavor of kinako-style roasted soybean powder..

    Unlike a standard snow cone, Korean bingsu is known for its fine, fluffy texture. This homemade version creates a café-worthy bowl of snow-soft milk shaved ice with classic injeolmi-inspired toppings in just a few simple steps.

    📜 The History Behind Injeolmi Bingsu

    Bingsu originated in Korea during the Joseon Dynasty, when shaved ice was served with sweetened red beans as patbingsu. At the time, ice was a luxury stored for royal and elite households. Over generations, the dessert became more accessible and evolved into one of Korea’s most creative café staples.

    Injeolmi is a traditional Korean rice cake made from pounded glutinous rice and coated in roasted soybean powder, often called konggaru. Its gentle nuttiness and soft chew inspired the modern injeolmi bingsu, which layers similar flavors over finely shaved milk ice. Today, it is a favorite in Korean dessert cafés, especially during hot and humid summers.

    🧾 Ingredients for Korean Injeolmi Bingsu

    • 3 cups whole milk, frozen into ice cubes
    • 1/2 cup roasted soybean powder (kinako or Korean konggaru)
    • 2 to 3 tablespoons sweetened condensed milk
    • 1/2 cup small injeolmi rice cakes, cut into bite-size pieces
    • 1/3 cup sweetened red bean paste (pat), optional
    • 1 tablespoon toasted sliced almonds or crushed peanuts, optional
    • 1 tablespoon honey or rice syrup, optional for extra sweetness

    Yield: 2 generous servings  |  Prep time: 15 minutes, plus freezing time

    ❄️ How to Make Injeolmi Bingsu Step by Step

    1. Freeze the milk 🥛
      Pour whole milk into ice cube trays and freeze until completely solid, ideally overnight. Milk-based ice is the secret to a creamier, softer texture than water ice.
    2. Prepare the rice cakes 🍡
      If your injeolmi rice cakes are refrigerated or firm, let them sit at room temperature for 10 to 15 minutes. Cut them into small, spoon-friendly pieces. If they feel sticky, lightly dust them with soybean powder.
    3. Shave or blend the frozen milk ❄️
      Add frozen milk cubes to a shaved-ice machine for the finest texture. Alternatively, use a powerful blender or food processor, pulsing in short bursts until the ice resembles fluffy snow. Work quickly to prevent melting.
    4. Build the bingsu bowl 🥣
      Divide the milk snow between two chilled bowls. Gently mound it high rather than pressing it down; an airy pile gives bingsu its signature café-style appearance.
    5. Add the nutty injeolmi flavor ✨
      Generously sift roasted soybean powder over the shaved milk ice. Add the injeolmi pieces and spoon sweet red bean paste over one side, if using.
    6. Finish and serve immediately 🍯
      Drizzle with condensed milk and, if desired, a little honey or rice syrup. Sprinkle with almonds or peanuts for crunch. Serve right away with wide spoons and mix gently as you eat.

    🌿 Health Benefits and Smart Serving Tips

    Injeolmi bingsu is still a dessert, but it offers a few appealing nutritional touches. Roasted soybean powder contains plant-based protein, fiber, and minerals such as iron and magnesium. Milk contributes calcium and protein, while red bean paste can provide fiber and naturally occurring antioxidants.

    • Choose unsweetened soybean powder: This lets you control the sweetness with condensed milk or honey.
    • Use whole milk for the best texture: Lower-fat milk can freeze harder and produce icier flakes.
    • Chill your serving bowls: Cold bowls slow melting and keep the shaved ice fluffy longer.
    • For a vegan version: Freeze oat milk or soy milk, use plant-based condensed milk, and choose dairy-free rice cakes.
    • Serve immediately: Bingsu is at its best within minutes of shaving.

    ❓ Injeolmi Bingsu FAQ

    What is injeolmi bingsu made of?

    Injeolmi bingsu is typically made with finely shaved milk ice, roasted soybean powder, chewy Korean rice cakes, and sweetened condensed milk. Many versions also include sweet red bean paste, nuts, or a light drizzle of honey.

    Can I make Korean milk shaved ice without a shaved-ice machine?

    Yes. Freeze milk in small cubes, then pulse the cubes in a high-powered blender or food processor. Blend in small batches and stop as soon as the ice becomes fine and fluffy. Avoid over-blending, which can turn it into a milk slush.

    What can I substitute for Korean roasted soybean powder?

    Japanese kinako is the closest and easiest substitute because it is also roasted soybean flour. Do not replace it with regular soy flour unless it has been roasted; raw soy flour has a noticeably different flavor.

    Can I make injeolmi bingsu ahead of time?

    You can freeze the milk cubes and prepare toppings up to several days ahead. However, shave the milk and assemble the dessert immediately before serving, as the delicate ice melts quickly.

    Where can I buy injeolmi rice cakes?

    Look for injeolmi at Korean grocery stores, Asian supermarkets, or online specialty retailers. Plain mochi can work in a pinch, but authentic injeolmi has a softer texture and is traditionally paired with roasted soybean powder.

    Recommended Ingredients 🛒

    Bring home the authentic, nutty flavor of Korean café bingsu with fresh roasted soybean powder, chewy rice cakes, and sweet red bean paste.

    👉 Shop Fresh Ingredients on Amazon

    Recommended Kitchen Tools 🍧

    Create that signature snow-like texture at home with a reliable shaved-ice machine, powerful blender, and chilled dessert bowls.

    👉 Check Out Essential Cooking Tools on Amazon

    * Disclaimer: As an Amazon Associate, I earn from qualifying purchases at no additional cost to you.

    TAGS: #InjeolmiBingsu, #KoreanDessert, #MilkShavedIce, #Kinako, #BingsuRecipe
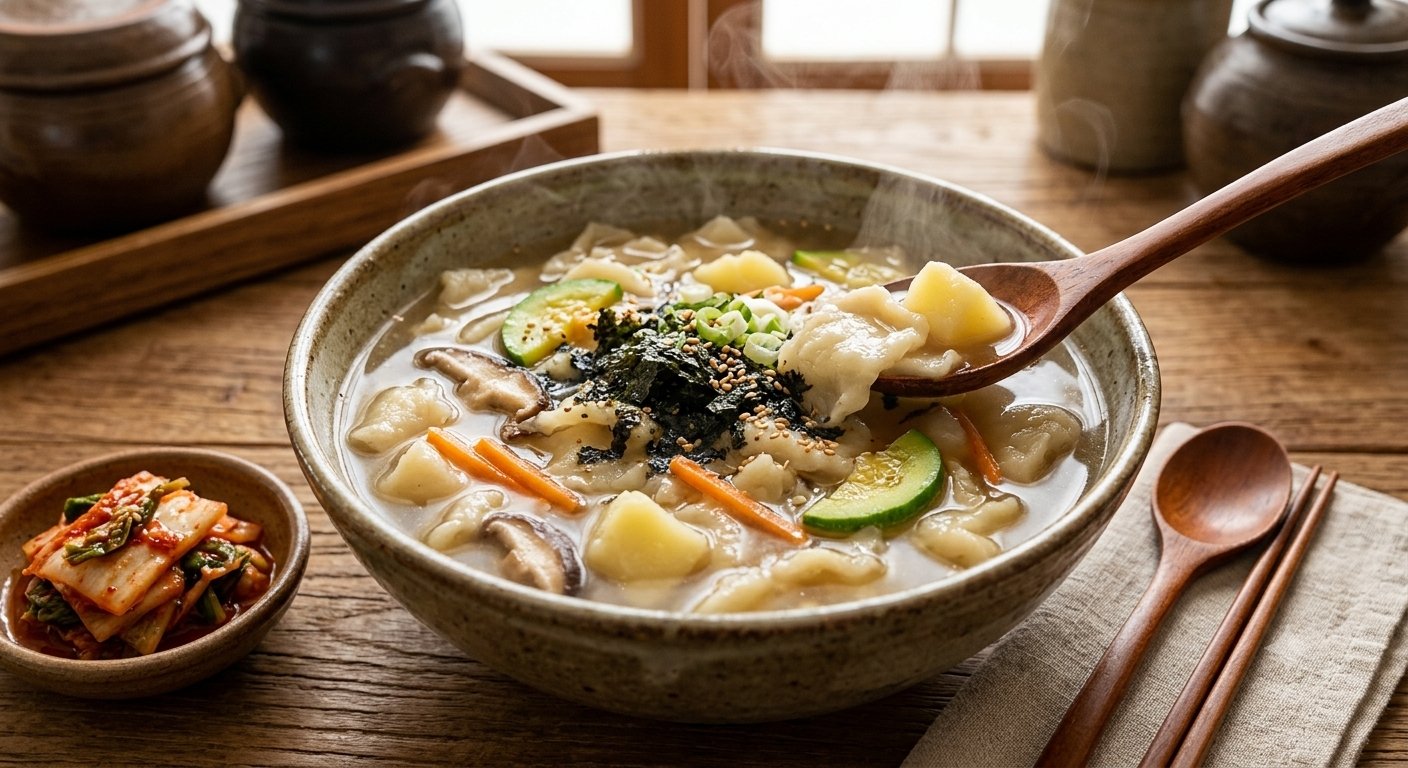
  • Sujebi: Rustic Korean Hand-Torn Noodle Soup in Comforting Anchovy Broth

    Sujebi: Rustic Korean Hand-Torn Noodle Soup in Comforting Anchovy Broth

    When the weather turns cool—or you simply need a bowl of edible comfort—sujebi delivers. This beloved Korean soup features tender, hand-torn dough flakes drifting through a savory anchovy-kelp broth with potatoes, zucchini, and silky vegetables. Unlike neatly cut noodles, sujebi’s irregular shapes are the point: every bite is delightfully rustic, chewy, and deeply satisfying. 🍲

    📜 The Humble History of Korean Sujebi

    Sujebi (수제비) is a traditional Korean hand-torn noodle soup with roots in everyday home cooking. Its name comes from the Korean words suggesting dough “torn by hand,” a technique that requires no pasta machine, knife skills, or special equipment. Historically, Korean families prepared sujebi when rice was scarce or when a nourishing, economical meal was needed from pantry staples.

    While recipes vary by region and household, the classic version begins with a clean, umami-rich broth made from dried anchovies and kelp. Seasonal vegetables are simmered in the broth, while rested wheat dough is stretched and torn directly into the pot. The result is a warming Korean comfort food that feels both simple and special—especially when served with bright, tangy kimchi. 🇰🇷

    🛒 Ingredients for Authentic Anchovy Broth Sujebi

    • 2 cups all-purpose flour
    • ¾ teaspoon fine salt
    • ¾ cup lukewarm water, plus 1 to 2 tablespoons if needed
    • 6 cups water
    • 10 large dried anchovies, heads and dark innards removed
    • 1 piece dried kelp (dashima), about 4 x 4 inches
    • 1 medium potato, peeled and cut into thin bite-size pieces
    • ½ small zucchini, cut into thin half-moons
    • ½ small onion, thinly sliced
    • 2 garlic cloves, minced
    • 1 tablespoon soup soy sauce or regular soy sauce
    • Salt, to taste
    • 1 scallion, thinly sliced
    • Optional: Korean chili flakes, sesame oil, or kimchi for serving

    🥣 How to Make Sujebi Step by Step

    1. Make the dough. In a medium bowl, combine flour and salt. Gradually add lukewarm water while mixing with chopsticks, a fork, or your hands. Knead for 3 to 5 minutes until the dough comes together. It should feel soft and slightly tacky, not wet. Cover and rest for at least 30 minutes. ⏳
    2. Build the anchovy-kelp broth. Add water, prepared dried anchovies, and dried kelp to a large pot. Bring it gently to a simmer over medium heat. Remove the kelp after 5 minutes to prevent bitterness, then simmer the anchovies for 10 more minutes.
    3. Strain and season. Remove and discard the anchovies. Add potato, onion, garlic, and soy sauce to the clear broth. Simmer for 8 to 10 minutes, until the potato is nearly tender. Tip: Thin potato slices cook quickly and help give the broth extra body.
    4. Add zucchini. Stir in the zucchini and cook for 2 minutes. Keep the broth at a steady, gentle boil so the vegetables remain vibrant and the dough cooks evenly. 🥒
    5. Tear in the dough. Wet your fingertips with water. Pinch off a small piece of dough, stretch it thin, and tear it directly into the simmering broth. Repeat until all the dough is used. Make each piece thin because it will puff slightly as it cooks. ✋
    6. Cook until tender. Stir gently to keep the sujebi pieces from sticking together. Cook for 4 to 6 minutes, until the dough is tender, slightly chewy, and floating in the broth.
    7. Finish and serve. Taste the soup and adjust with salt or a little more soy sauce. Add scallions, then ladle into warm bowls. Finish with a few drops of sesame oil or Korean chili flakes if desired. Serve immediately with kimchi for the full Korean comfort-food experience. 🌶️

    🌿 Health Benefits and Practical Sujebi Tips

    Sujebi is a naturally comforting one-pot meal that can be adapted to your needs. The broth provides hydration, while potatoes contribute potassium and energy-rich carbohydrates. Zucchini, onion, garlic, and scallions add fiber, antioxidants, and aromatic flavor without relying on heavy cream or butter.

    • For a lighter bowl: Add spinach, napa cabbage, mushrooms, or shredded carrots.
    • For more protein: Stir in cooked shredded chicken, clams, tofu, or thinly sliced beef.
    • For a chewier texture: Rest the dough for 1 hour in the refrigerator.
    • For deeper flavor: Use Korean soup soy sauce, which has a cleaner and more savory taste than standard soy sauce.
    • Best serving advice: Enjoy sujebi fresh. The hand-torn noodles continue to absorb broth as they sit.

    ❓ Sujebi FAQ: Korean Hand-Torn Noodle Soup

    What is sujebi made of?

    Sujebi is made with a simple wheat flour dough, water, and salt. The dough is rested, stretched thin, and torn by hand into simmering broth. A traditional Korean sujebi broth often includes dried anchovies and kelp, plus vegetables such as potatoes and zucchini.

    Can I make sujebi dough ahead of time?

    Yes. Make the dough up to one day ahead, wrap it tightly, and refrigerate it. Let it sit at room temperature for about 20 minutes before stretching and tearing. Rested dough is easier to handle and produces pleasantly chewy noodles.

    What can I use instead of dried anchovies in sujebi broth?

    For a vegetarian sujebi, replace anchovies with a broth made from dried shiitake mushrooms, kelp, onion, and radish. You can also use a good-quality vegetable stock, although dried kelp will add a more traditional Korean umami flavor.

    Why is my sujebi dough tough?

    Tough sujebi usually comes from using too little water, overworking the dough, or skipping the resting period. Keep the dough soft, knead only until smooth, and rest it for at least 30 minutes so the gluten can relax.

    Can leftover sujebi be reheated?

    Yes, but the dough pieces will soften as they absorb broth. Reheat gently with a splash of water or stock. For the best texture, store extra uncooked dough separately and tear it into fresh broth when ready to eat.

    Recommended Ingredients 🛒

    Bring authentic Korean pantry flavor to your kitchen with quality dried anchovies, kelp, soup soy sauce, and other fresh essentials for a deeply savory sujebi broth.

    👉 Shop Fresh Ingredients on Amazon

    Recommended Kitchen Tools 🍳

    A sturdy soup pot, fine strainer, and roomy mixing bowl make preparing silky broth and tender hand-torn noodles easy and enjoyable.

    👉 Check Out Essential Cooking Tools on Amazon

    * Disclaimer: As an Amazon Associate, I earn from qualifying purchases at no additional cost to you.

    TAGS: #Sujebi, #KoreanFood, #NoodleSoup, #AnchovyBroth, #ComfortFood

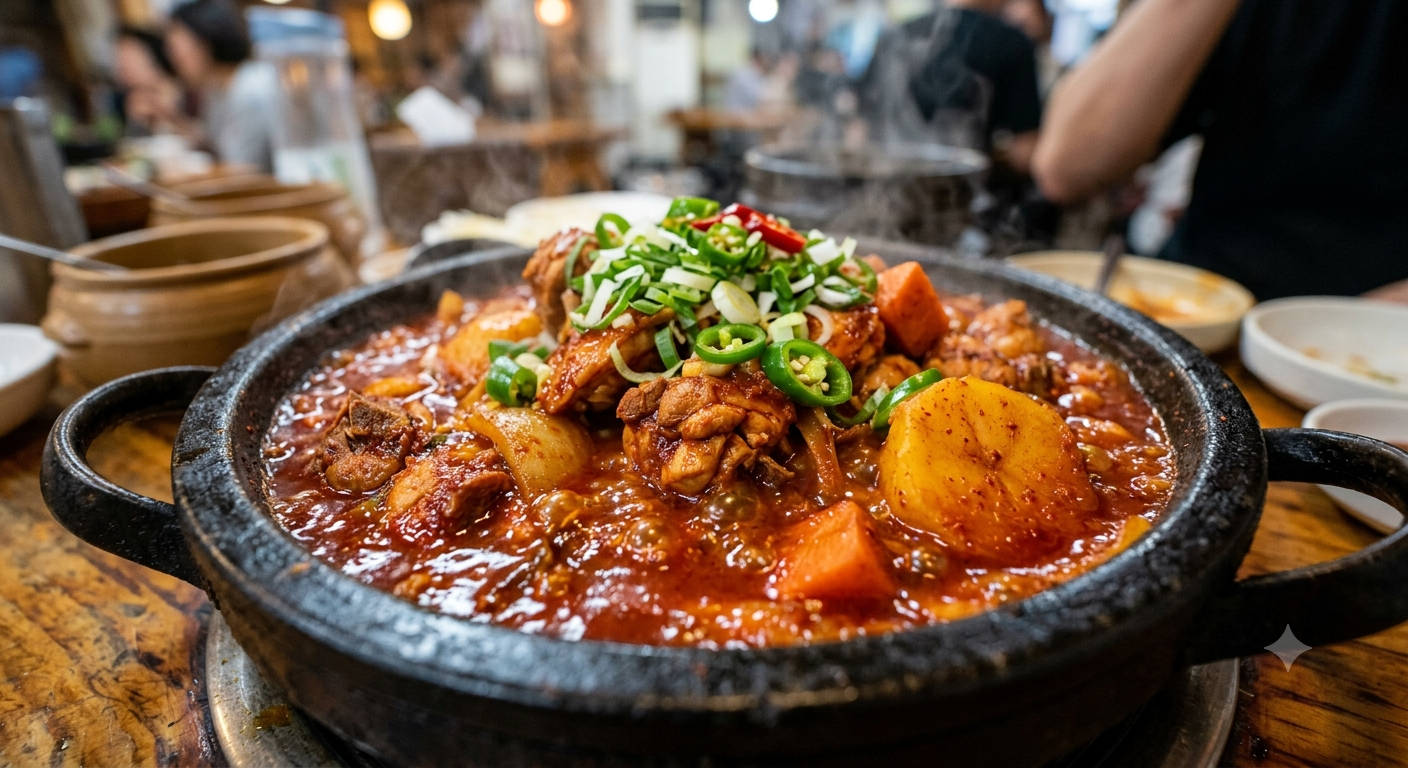
  • Dakbokkeumtang: Spicy Korean Braised Chicken Stew Bursting with Savory Heat

    Dakbokkeumtang: Spicy Korean Braised Chicken Stew Bursting with Savory Heat

    Few dishes capture the bold, comforting spirit of Korean home cooking like dakbokkeumtang. This fiery braised chicken stew combines tender chicken, soft potatoes, sweet vegetables, and a deeply savory red chile broth that warms you from the inside out. Also known as Korean spicy braised chicken, it is the kind of one-pot meal that turns an ordinary dinner into a memorable feast.

    📜 The History and Tradition of Dakbokkeumtang

    Dakbokkeumtang (닭볶음탕) is a beloved Korean comfort dish traditionally made by simmering chicken with potatoes, carrots, onions, and a chile-forward sauce. Its name roughly translates to “stir-fried chicken stew,” although the dish is primarily braised until the chicken becomes exceptionally tender.

    Historically, chicken was often reserved for family gatherings, celebrations, and nourishing meals at home. Over time, dakbokkeumtang became a popular everyday dish throughout South Korea, especially during cooler months. The recipe reflects the classic Korean balance of spice, sweetness, garlic, and umami, usually created with gochujang, gochugaru, soy sauce, and sesame oil.

    Today, this hearty Korean chicken stew is commonly served family-style with steamed rice, kimchi, and crisp vegetable side dishes called banchan.

    🛒 Ingredients for Spicy Korean Braised Chicken Stew

    • 2 pounds bone-in chicken thighs or drumsticks, cut into serving pieces
    • 1 tablespoon neutral cooking oil
    • 1 medium onion, cut into large chunks
    • 3 medium potatoes, peeled and cut into bite-size pieces
    • 1 medium carrot, cut into thick rounds
    • 3 scallions, cut into 2-inch pieces
    • 4 garlic cloves, minced
    • 1 tablespoon grated fresh ginger
    • 2 tablespoons gochujang (Korean red chile paste)
    • 2 tablespoons gochugaru (Korean red chile flakes)
    • 3 tablespoons soy sauce
    • 1 tablespoon sugar or honey
    • 1 tablespoon rice wine or mirin
    • 2 1/2 cups chicken stock or water
    • 1 teaspoon sesame oil
    • 1 teaspoon toasted sesame seeds, optional

    🍲 How to Make Dakbokkeumtang Step by Step

    1. Prepare the chicken. Pat the chicken dry with paper towels. If desired, briefly blanch the pieces in boiling water for 2 minutes, then drain and rinse. This classic Korean technique helps create a cleaner, clearer braising broth.
    2. Make the spicy sauce 🌶️. In a small bowl, mix the gochujang, gochugaru, soy sauce, sugar, rice wine, garlic, and ginger. Stir until smooth and fragrant.
    3. Brown the chicken. Heat the oil in a large Dutch oven or heavy pot over medium-high heat. Add the chicken and cook for 4 to 5 minutes, turning occasionally, until lightly browned.
    4. Add the aromatics and sauce. Add the onion and prepared sauce to the pot. Stir for about 1 minute, coating the chicken well. The sauce should smell rich, garlicky, and slightly smoky.
    5. Braise until tender ⏲️. Pour in the chicken stock. Bring to a boil, then reduce the heat to medium-low. Cover and simmer for 20 minutes.
    6. Add vegetables. Add the potatoes and carrots. Continue simmering uncovered for 20 to 25 minutes, or until the potatoes are fork-tender and the chicken reaches an internal temperature of 165°F (74°C).
    7. Finish and serve. Stir in the scallions and sesame oil during the final 2 minutes of cooking. Sprinkle with sesame seeds, then serve hot with fluffy steamed rice. For extra heat, add a pinch of gochugaru at the table.

    💚 Health Benefits and Smart Cooking Tips

    Dakbokkeumtang offers a satisfying balance of protein, vegetables, and warming spices. Chicken provides high-quality protein, while potatoes and carrots add filling carbohydrates, potassium, and fiber. Garlic and ginger contribute bold flavor without relying on excessive fat, and Korean chile peppers contain capsaicin, a natural compound associated with metabolism-supporting heat.

    • Control the spice: Use 1 tablespoon of gochugaru for a milder stew, or add extra chile flakes for restaurant-style heat.
    • Choose bone-in chicken: Bones add body and deeper flavor to the braising liquid.
    • Do not over-stir: Stir gently after adding potatoes so they keep their shape.
    • Serve with rice: Steamed short-grain rice softens the spice and soaks up the flavorful sauce.

    ❓ Dakbokkeumtang FAQ

    What is the best chicken cut for dakbokkeumtang?

    Bone-in chicken thighs and drumsticks are the best choices because they stay juicy during braising and create a richer broth. You can use boneless thighs, but reduce the cooking time so the meat does not dry out.

    Can I make Korean spicy braised chicken ahead of time?

    Yes. Dakbokkeumtang tastes even better the next day because the chile, garlic, and soy flavors deepen overnight. Store it in an airtight container in the refrigerator for up to 3 days, then reheat gently on the stovetop with a splash of water or stock.

    What can I substitute for gochujang?

    For the most authentic flavor, use gochujang. If unavailable, combine miso paste with a little sriracha or another chile paste, though the flavor will be less sweet and fermented. Add a small pinch of sugar to balance the substitute.

    Can I make dakbokkeumtang less spicy?

    Absolutely. Reduce the gochugaru by half and use a mild gochujang. Adding extra potatoes, onions, or a little more stock also softens the heat without sacrificing the stew’s savory character.

    What should I serve with dakbokkeumtang?

    Serve this Korean chicken stew with steamed rice, kimchi, cucumber salad, sautéed spinach, or roasted seaweed. A cold, crunchy side dish provides a delicious contrast to the hot, rich braise.

    🥬 Recommended Ingredients

    Bring authentic Korean flavor to your kitchen with fresh gochujang, aromatic gochugaru, sesame oil, and premium pantry staples for this comforting dakbokkeumtang recipe.

    👉 Shop Fresh Ingredients on Amazon

    🍳 Recommended Kitchen Tools

    A sturdy Dutch oven or heavy braising pot helps the chicken cook evenly and gives this Korean spicy chicken stew its rich, concentrated sauce.

    👉 Check Out Essential Cooking Tools on Amazon

    * Disclaimer: As an Amazon Associate, I earn from qualifying purchases at no additional cost to you.

    TAGS: #Dakbokkeumtang, #KoreanFood, #SpicyChicken, #KoreanStew, #ComfortFood

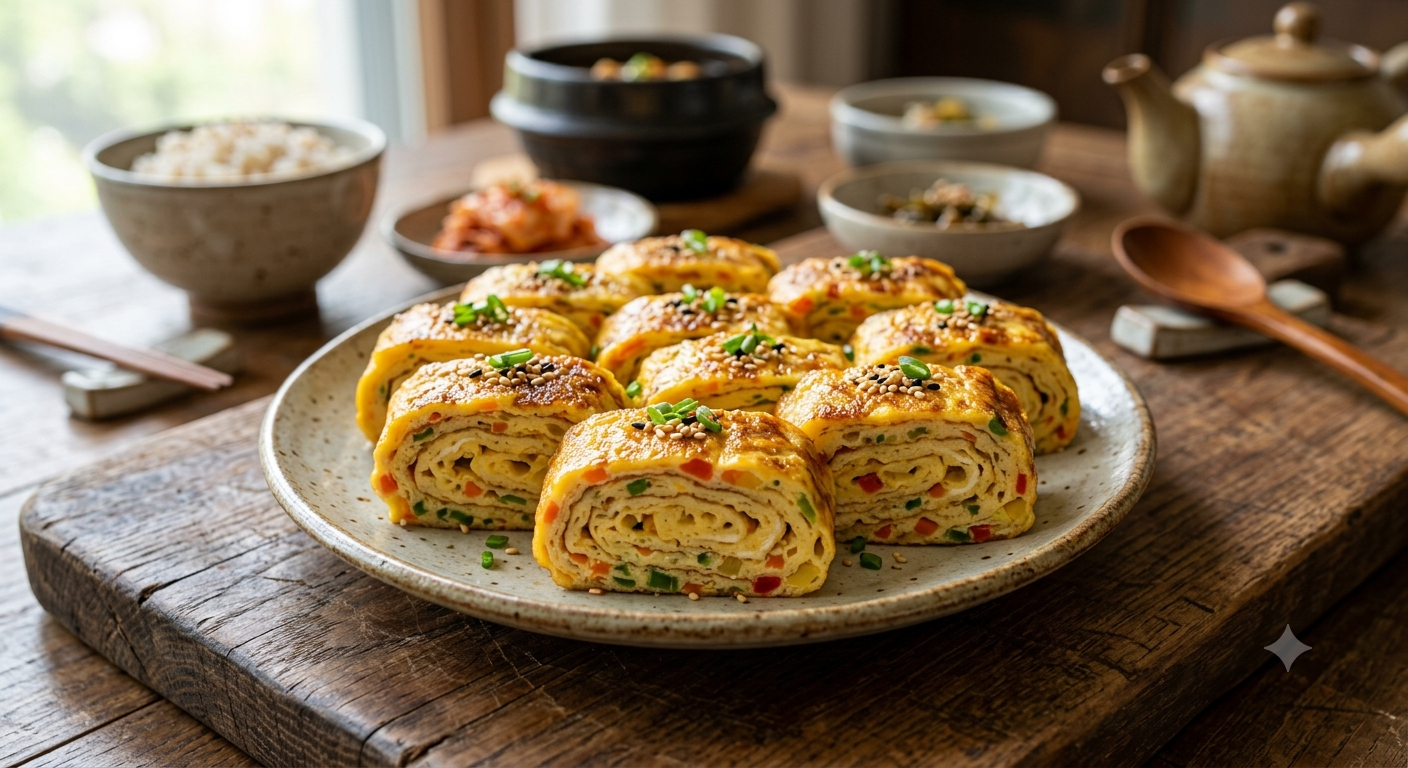
  • Gyeran-mari: Fluffy and Colorful Korean Rolled Omelette with Crisp Layers

    Gyeran-mari: Fluffy and Colorful Korean Rolled Omelette with Crisp Layers

    Golden, tender, and beautifully layered, gyeran-mari is Korea’s answer to the everyday omelette—only more playful, more colorful, and delightfully sliceable. This Korean rolled omelette combines softly cooked eggs with bright vegetables, creating neat spirals with lightly crisp edges. It is a beloved banchan (side dish), a lunchbox favorite, and an easy way to make simple eggs feel special.

    📜 The Traditional Background of Gyeran-mari

    Gyeran means egg in Korean, while mari means rolled. Although egg dishes have long appeared on Korean tables, gyeran-mari became especially popular as a practical home-style dish: affordable, quick to prepare, and easy to customize with whatever vegetables were available.

    Today, it is commonly served alongside rice, kimchi, grilled fish, or savory Korean stews. You may find versions filled with scallions, carrots, zucchini, seaweed, cheese, ham, or even minced shrimp. The classic appeal lies in its contrast: a fluffy, moist egg center paired with thin, gently browned outer layers that stay pleasantly crisp around the edges.

    🛒 Ingredients for Korean Rolled Omelette

    • 5 large eggs
    • 2 tablespoons milk or water
    • 1/4 teaspoon fine salt
    • 1/8 teaspoon black pepper
    • 2 tablespoons finely diced carrot
    • 2 tablespoons finely chopped green onion
    • 2 tablespoons finely diced red bell pepper
    • 1 tablespoon finely chopped onion, optional
    • 1 teaspoon toasted sesame oil, optional
    • 1 to 2 teaspoons neutral cooking oil

    Best pan: A rectangular tamagoyaki-style pan creates the cleanest roll, but a small nonstick skillet also works well. The secret is using low to medium-low heat so the omelette cooks through without browning too quickly.

    👩‍🍳 Step-by-Step Gyeran-mari Recipe

    1. Prepare the vegetables 🥕
      Dice the carrot, bell pepper, and onion as finely as possible. Chop the green onion. Small pieces are essential because they help the omelette roll tightly and prevent tearing.
    2. Whisk the egg mixture 🥚
      Crack the eggs into a bowl. Add milk or water, salt, pepper, and toasted sesame oil if using. Whisk until the yolks and whites are fully combined, then stir in the vegetables.
    3. Heat the pan gently 🔥
      Place a nonstick pan over medium-low heat. Add a thin coating of neutral oil and wipe away excess with a paper towel. The surface should be lightly glossy, not oily.
    4. Cook the first egg layer
      Pour in about one-third of the egg mixture. Tilt the pan so it forms a thin, even layer. Cook until the bottom is set and the top remains slightly wet.
    5. Roll carefully 🌯
      Starting from one end, use a spatula or chopsticks to fold the egg over itself two or three times. Slide the rolled portion to one side of the pan.
    6. Add more egg mixture
      Lightly oil the empty side of the pan. Pour in half of the remaining egg mixture, lifting the existing roll slightly so fresh egg runs underneath it. Once mostly set, roll the omelette over the new layer.
    7. Finish the final layer ✨
      Repeat with the remaining egg mixture. Turn the finished roll gently for 30 to 60 seconds, allowing all sides to set while retaining a tender center.
    8. Rest, slice, and serve
      Transfer the gyeran-mari to a cutting board and let it rest for 2 minutes. Slice into thick rounds and serve warm or at room temperature with rice, kimchi, or a drizzle of ketchup for a classic Korean lunchbox touch.

    🌿 Health Benefits and Smart Cooking Tips

    Eggs provide high-quality protein, choline, vitamin B12, and vitamin D. Adding carrots, peppers, and green onions introduces fiber, antioxidants, and extra color without much preparation. For a lighter version, use water instead of milk and keep oil to a minimum.

    • For crisp layers: Use a well-heated nonstick pan and cook each thin layer until just set before rolling.
    • For a fluffier texture: Add 2 tablespoons of milk, water, or unsweetened soy milk.
    • For clean slices: Let the omelette rest briefly before cutting with a sharp knife.
    • For extra flavor: Add shredded cheese, cooked ham, crumbled seaweed, or a pinch of Korean soup soy sauce.

    ❓ Gyeran-mari FAQ

    Can I make gyeran-mari without a rectangular pan?

    Yes. A small 8-inch nonstick skillet works very well. The roll may be rounder rather than rectangular, but it will still have the same fluffy layers and colorful appearance.

    Why does my Korean rolled omelette tear when I roll it?

    Tearing usually happens when the egg layer is too thin, too dry, or cooked over high heat. Keep the heat at medium-low and roll while the top is still slightly moist. Finely dice vegetables so they do not break through the egg.

    Can I make gyeran-mari ahead of time?

    Absolutely. Cook, cool, and refrigerate it in an airtight container for up to 2 days. Serve cold in lunchboxes or reheat gently in a microwave for 15 to 20 seconds.

    What can I substitute for green onion?

    Use finely chopped chives, leek greens, zucchini, spinach, or even a small amount of minced onion. Avoid watery vegetables unless they are sautéed first, as excess moisture can make the omelette difficult to roll.

    Is gyeran-mari served hot or cold?

    It is delicious both ways. Freshly cooked gyeran-mari is soft and warm, while chilled slices are firm, convenient, and ideal for Korean-style packed lunches.

    🥬 Recommended Ingredients

    Bring out the authentic Korean flavor with fresh eggs, colorful vegetables, and fragrant toasted sesame oil. Stock your pantry with quality ingredients for your next banchan spread.

    👉 Shop Fresh Ingredients on Amazon

    🍳 Recommended Kitchen Tools

    A reliable nonstick pan, silicone spatula, and sharp knife make rolling and slicing gyeran-mari effortlessly neat. A rectangular omelette pan is especially helpful for crisp, even layers.

    👉 Check Out Essential Cooking Tools on Amazon

    * Disclaimer: As an Amazon Associate, I earn from qualifying purchases at no additional cost to you.

    TAGS: #GyeranMari, #KoreanFood, #KoreanOmelette, #Banchan, #EasyEggRecipe

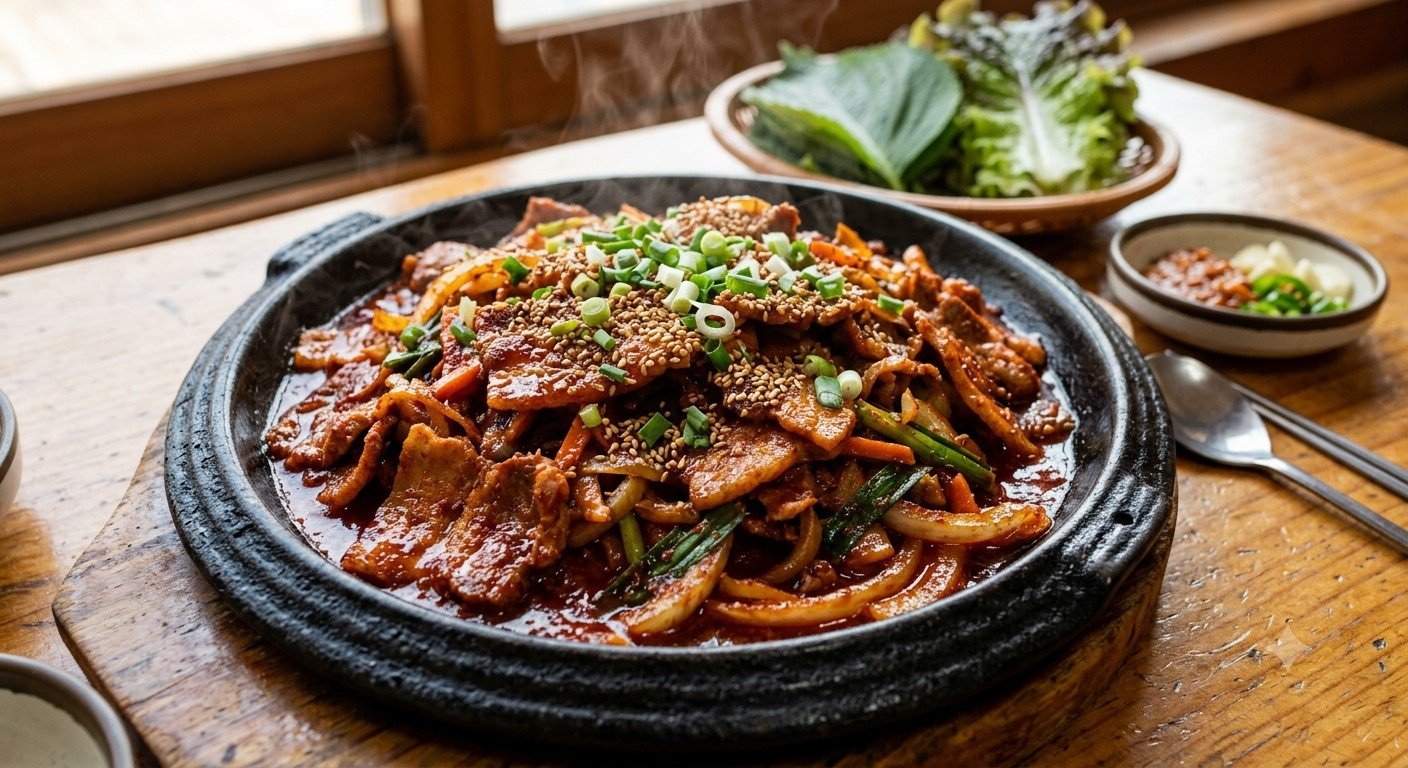
  • Jeyuk Bokkeum: Fiery and Sweet Korean Spicy Stir-Fried Pork

    Jeyuk Bokkeum: Fiery and Sweet Korean Spicy Stir-Fried Pork

    There is something irresistible about Jeyuk Bokkeum: thin slices of pork sizzling in a glossy red sauce that is spicy, savory, sweet, and deeply aromatic. This beloved Korean stir-fry delivers restaurant-worthy flavor in under 40 minutes, making it an ideal weeknight dinner for anyone craving bold Korean comfort food.

    📜 The History of Jeyuk Bokkeum

    Jeyuk Bokkeum (제육볶음) translates roughly to “stir-fried pork” in Korean. It is a popular everyday dish throughout South Korea, especially in casual restaurants, school cafeterias, and home kitchens. Its signature red color and warming heat come from gochujang, Korea’s fermented red chili paste, along with gochugaru chili flakes.

    Traditionally, Korean cooks marinate pork in a balance of spicy chili paste, soy sauce, garlic, ginger, sesame oil, and a touch of sweetness. The pork is then stir-fried quickly at high heat with onions and vegetables. Served with steamed rice, crisp lettuce leaves, and kimchi, Jeyuk Bokkeum is a classic example of how Korean cuisine layers heat, umami, and freshness in one satisfying meal.

    🍳 Jeyuk Bokkeum Recipe: Ingredients

    • 1½ pounds thinly sliced pork shoulder or pork belly
    • 1 medium onion, thinly sliced
    • 1 small carrot, cut into thin matchsticks
    • 2 green onions, cut into 2-inch pieces
    • 1 tablespoon neutral cooking oil
    • 1 tablespoon toasted sesame seeds, for garnish

    For the Spicy Korean Marinade 🌶️

    • 3 tablespoons gochujang (Korean red chili paste)
    • 1 tablespoon gochugaru (Korean red pepper flakes)
    • 2 tablespoons soy sauce
    • 1½ tablespoons honey or brown sugar
    • 1 tablespoon rice wine or mirin
    • 1 tablespoon sesame oil
    • 4 garlic cloves, minced
    • 1 teaspoon freshly grated ginger
    • ½ teaspoon black pepper

    🔥 How to Make Korean Spicy Stir-Fried Pork

    1. Slice the pork. Cut pork shoulder or pork belly into thin, bite-size strips. Slightly freezing the pork for 15 to 20 minutes first makes slicing easier and more even.
    2. Mix the marinade 🥣 In a large bowl, whisk together gochujang, gochugaru, soy sauce, honey, rice wine, sesame oil, garlic, ginger, and black pepper until smooth.
    3. Marinate for deeper flavor. Add the pork to the bowl and toss thoroughly until every piece is coated in the red marinade. Let it rest for at least 20 minutes, or refrigerate for up to 8 hours.
    4. Heat the pan 🔥 Place a large skillet, wok, or cast-iron pan over medium-high heat. Add the neutral oil and allow it to shimmer.
    5. Stir-fry the pork. Add the marinated pork in a single layer, working in batches if necessary. Cook for 5 to 7 minutes, stirring often, until browned at the edges and cooked through.
    6. Add vegetables 🧅 Stir in the onion and carrot. Cook for 3 to 4 minutes until tender-crisp, then add the green onions for the final minute.
    7. Finish and serve. Sprinkle with sesame seeds and serve immediately with hot rice, kimchi, lettuce wraps, or perilla leaves. For an authentic Korean table, add a spoonful of ssamjang on the side.

    🌿 Health Benefits and Smart Cooking Tips

    Jeyuk Bokkeum is rich in protein, iron, and B vitamins from pork, while garlic, ginger, and chili peppers contribute flavorful plant compounds. Gochujang also provides fermented depth, allowing you to use less heavy sauce or added fat.

    • Choose pork shoulder for a balanced, juicy result with less richness than pork belly.
    • Control the heat: Use less gochugaru for a milder dish, or add an extra teaspoon for a fiery version.
    • Avoid crowding the pan: High heat and space are essential for caramelized edges rather than steamed pork.
    • Balance the meal: Serve with brown rice, shredded cabbage, cucumber salad, or lettuce wraps for extra fiber and freshness.

    ❓ Jeyuk Bokkeum FAQ

    What is the best cut of pork for Jeyuk Bokkeum?

    Pork shoulder, also called Boston butt, is the best all-around choice because it stays tender and flavorful during stir-frying. Pork belly creates a richer, fattier result, while pork loin can work if sliced very thinly and cooked quickly.

    Can I make Jeyuk Bokkeum ahead of time?

    Yes. The pork can marinate in the refrigerator for up to 8 hours, making it an excellent make-ahead Korean dinner. Cooked leftovers keep well for 3 days in an airtight container and reheat beautifully in a skillet.

    What can I substitute for gochujang?

    For the closest alternative, combine miso paste, sriracha, a little honey, and a pinch of chili powder. However, authentic gochujang has a fermented, savory-sweet character that is difficult to duplicate exactly, so it is worth seeking out.

    Is Jeyuk Bokkeum very spicy?

    It is usually medium to hot, but the spice level is flexible. Reduce the gochugaru and use a mild gochujang for a gentler version. Serve with rice and lettuce wraps to soften the heat naturally.

    What should I serve with Korean spicy pork?

    Steamed short-grain rice, kimchi, lettuce leaves, cucumber salad, and Korean pickled radish are classic choices. A cold beer, barley tea, or sparkling water with citrus also pairs well with the dish’s savory heat.

    Recommended Ingredients 🌶️

    Bring authentic Korean flavor to your kitchen with fresh gochujang, gochugaru, sesame oil, and pantry staples selected for this spicy pork recipe.

    👉 Shop Fresh Ingredients on Amazon

    Recommended Kitchen Tools 🍳

    A spacious wok, heavy skillet, or cast-iron pan helps create the high-heat caramelization that makes Jeyuk Bokkeum especially delicious.

    👉 Check Out Essential Cooking Tools on Amazon

    * Disclaimer: As an Amazon Associate, I earn from qualifying purchases at no additional cost to you.

    TAGS: #JeyukBokkeum, #KoreanFood, #SpicyPork, #Gochujang, #EasyDinner

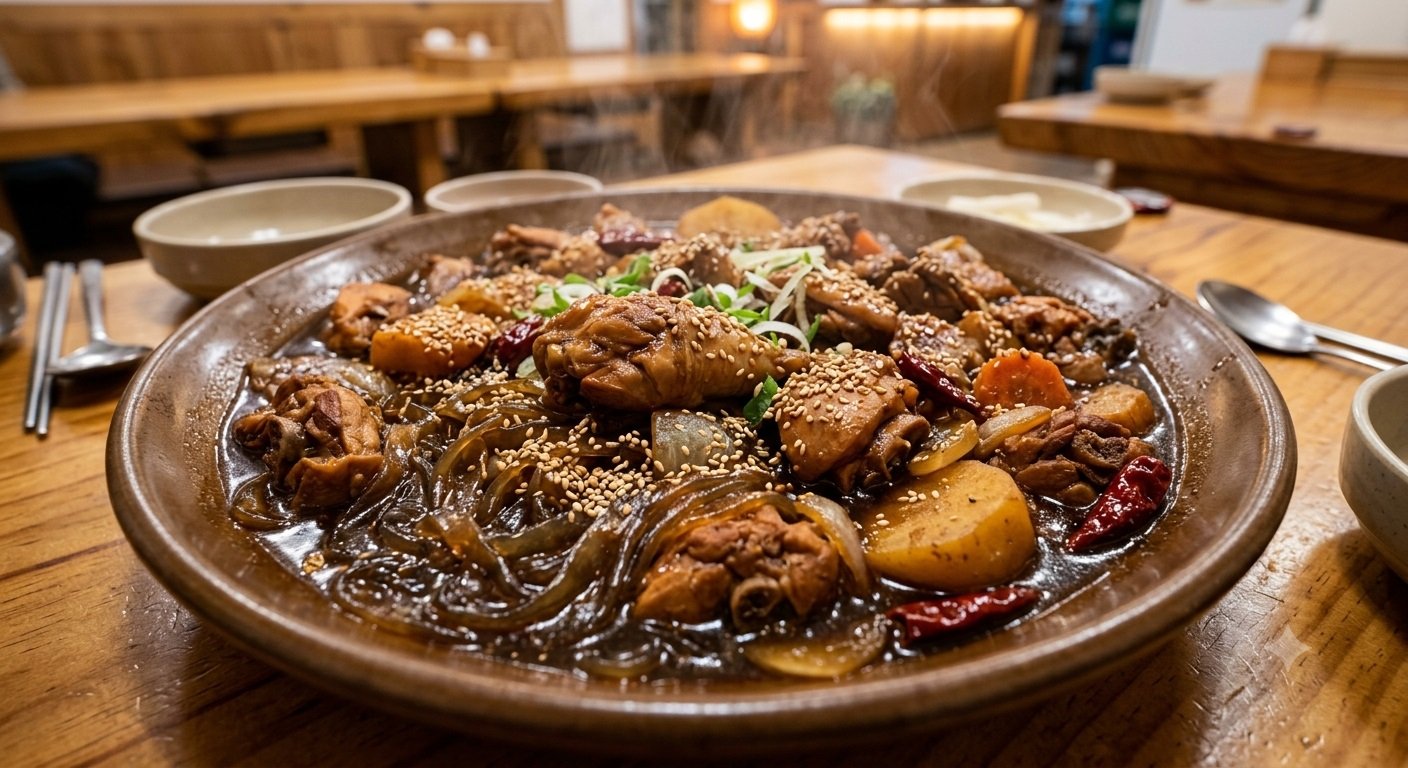
  • Andong Jjimdak: Sweet and Savory Korean Braised Chicken with Glass Noodles

    Andong Jjimdak: Sweet and Savory Korean Braised Chicken with Glass Noodles

    Comforting, glossy, and deeply savory, Andong Jjimdak is the kind of Korean braised chicken dish that turns an ordinary dinner into a feast. Tender chicken, chewy glass noodles, potatoes, carrots, and mushrooms simmer in a richly seasoned soy sauce broth with a gentle sweetness and warming peppery finish. The result is a fragrant one-pan meal that is as satisfying for weeknight cooking as it is for sharing with friends..

    📜 The History of Andong Jjimdak

    Andong Jjimdak comes from Andong, a historic city in North Gyeongsang Province, South Korea. While braised chicken dishes have long been part of Korean home cooking, the modern version became especially popular in the late 20th century around Andong’s traditional market streets.

    Often described as a Korean answer to soy-braised chicken, this dish is known for its generous use of dangmyeon, or Korean sweet potato glass noodles. These translucent noodles absorb the sweet-savory braising sauce, becoming wonderfully chewy and flavorful. Traditionally made with bone-in chicken and a mix of seasonal vegetables, Andong Jjimdak is a beloved communal dish served in a large bowl at the center of the table.

    🛒 Ingredients for Authentic Andong Jjimdak

    • 2 1/2 pounds bone-in, skin-on chicken thighs or drumsticks, cut into serving pieces
    • 8 ounces Korean sweet potato glass noodles (dangmyeon)
    • 2 medium potatoes, peeled and cut into chunks
    • 1 large carrot, cut into thick rounds
    • 1 small onion, cut into wedges
    • 6 ounces shiitake mushrooms or cremini mushrooms, sliced
    • 2 green onions, cut into 2-inch pieces
    • 3 dried red chilies or 1 sliced fresh red chili, optional
    • 1 tablespoon toasted sesame seeds

    For the Sweet-Savory Braising Sauce

    • 1/2 cup soy sauce
    • 2 tablespoons dark soy sauce, optional for deeper color
    • 3 tablespoons brown sugar or Korean rice syrup
    • 1 tablespoon minced garlic
    • 1 tablespoon minced ginger
    • 1 tablespoon sesame oil
    • 1/2 teaspoon black pepper
    • 2 1/2 cups water or low-sodium chicken stock

    👩‍🍳 How to Make Andong Jjimdak Step by Step

    1. Soak the glass noodles. 💧 Place the dangmyeon in a bowl of warm water for 20 to 30 minutes. They should soften slightly but not become fully tender, as they will finish cooking in the braising liquid.
    2. Blanch the chicken. Bring a pot of water to a boil. Add the chicken and boil for 3 minutes to remove excess fat and impurities. Drain well, then rinse the chicken briefly under warm water.
    3. Mix the sauce. 🥣 In a small bowl, combine soy sauce, dark soy sauce if using, brown sugar, garlic, ginger, sesame oil, black pepper, and water or chicken stock. Stir until the sugar is mostly dissolved.
    4. Begin braising. Add the blanched chicken, potatoes, carrots, onion, mushrooms, chilies, and prepared sauce to a large deep skillet or Dutch oven. Bring everything to a lively boil over medium-high heat.
    5. Simmer until tender. ⏱️ Reduce the heat to medium, cover loosely, and simmer for 20 to 25 minutes. Stir once or twice so the vegetables cook evenly and the chicken becomes coated in the glossy sauce.
    6. Add the noodles. Drain the soaked glass noodles and add them to the pan. Gently press them into the liquid. Cook for another 8 to 10 minutes, stirring carefully, until the noodles are translucent and have absorbed the sauce.
    7. Finish and serve. ✨ Add the green onions and cook for 1 to 2 minutes. Taste and adjust with a splash of soy sauce for saltiness or a little sugar for sweetness. Sprinkle with sesame seeds and serve hot with steamed rice and kimchi.

    🌿 Health Benefits and Smart Cooking Tips

    Andong Jjimdak offers a balanced combination of protein-rich chicken, filling vegetables, and naturally gluten-free sweet potato noodles. Chicken thighs provide iron, zinc, and B vitamins, while carrots, potatoes, mushrooms, and onions add fiber and important micronutrients.

    • Choose bone-in chicken for the richest flavor; the bones enrich the braising liquid as it cooks.
    • Control the sweetness by starting with 2 tablespoons of sugar, then adding more after tasting.
    • Keep noodles springy by adding them near the end. Overcooking can make glass noodles overly soft.
    • For a lighter version, remove chicken skin and use low-sodium soy sauce.
    • Make it spicy with sliced Korean green chilies, dried chilies, or a spoonful of gochugaru.

    ❓ Andong Jjimdak FAQ

    What is the best chicken cut for Andong Jjimdak?

    Bone-in chicken thighs, drumsticks, or a whole cut-up chicken are best for authentic Andong Jjimdak. Dark meat stays juicy during braising, while the bones create a fuller, more savory sauce. Boneless thighs work too, but reduce the simmering time by about 5 to 8 minutes.

    Can I make Andong Jjimdak ahead of time?

    Yes. The chicken and vegetables can be braised up to one day ahead and refrigerated in an airtight container. Reheat gently on the stovetop, then add freshly soaked glass noodles shortly before serving for the best chewy texture.

    What can I substitute for Korean glass noodles?

    Korean sweet potato glass noodles are the ideal choice because they are chewy and absorb sauce beautifully. If unavailable, use mung bean vermicelli or thick rice noodles. Add them cautiously because cooking times and liquid absorption vary.

    Is Andong Jjimdak spicy?

    Traditional Andong Jjimdak is usually mildly spicy rather than intensely hot. The soy-based sauce is primarily sweet and savory. Leave out the chilies for a family-friendly version, or add gochugaru and fresh chilies for more heat.

    How do I prevent the sauce from becoming too salty?

    Use low-sodium soy sauce or replace part of the soy sauce with water or unsalted chicken stock. Because the sauce reduces during braising, it is best to taste near the end before adding any extra seasoning.

    🥬 Recommended Ingredients

    Bring the authentic sweet-savory flavor of Andong Jjimdak to your table with quality Korean glass noodles, soy sauce, sesame oil, and pantry essentials.

    👉 Shop Fresh Ingredients on Amazon

    🍳 Recommended Kitchen Tools

    A large deep sauté pan, Dutch oven, or braising pot gives the chicken, vegetables, and noodles enough room to simmer evenly in the flavorful sauce.

    👉 Check Out Essential Cooking Tools on Amazon

    * Disclaimer: As an Amazon Associate, I earn from qualifying purchases at no additional cost to you.

    TAGS: #AndongJjimdak, #KoreanFood, #BraisedChicken, #GlassNoodles, #KoreanRecipe

  • Doenjang Jjigae: Hearty Korean Soybean Paste Stew with Earthy Depth

    Doenjang Jjigae: Hearty Korean Soybean Paste Stew with Earthy Depth

    Few dishes deliver as much soul-soothing comfort as Doenjang Jjigae, Korea’s beloved fermented soybean paste stew. Savory, earthy, deeply aromatic, and wonderfully flexible, this bubbling stew transforms simple vegetables, tofu, and broth into a meal that tastes far more complex than its short ingredient list suggests. Served steaming-hot with rice and banchan, it is the kind of everyday Korean comfort food that makes a kitchen feel instantly welcoming.

    📜 The History Behind Doenjang Jjigae

    Doenjang Jjigae (된장찌개) comes from Korea’s long-standing tradition of fermenting soybeans. Doenjang, a rustic Korean soybean paste, is traditionally made by fermenting blocks of cooked soybeans called meju, then aging them in brine. The resulting paste has a bold, nutty, salty character with a distinctive fermented depth.

    For centuries, Korean households have used doenjang as a practical pantry staple, especially during colder months when preserved foods were essential. While every family has its own version, the classic stew often includes zucchini, potato, onion, tofu, mushrooms, and green chile. Some cooks enrich it with seafood, pork belly, beef, or clams, but a vegetable-forward version remains one of the most popular and satisfying ways to enjoy this traditional Korean stew.

    🛒 Ingredients for Classic Doenjang Jjigae

    • 4 cups anchovy-kelp broth or vegetable broth
    • 2 tablespoons Korean doenjang (fermented soybean paste)
    • 1 teaspoon gochujang, optional for gentle heat
    • 1 small potato, diced
    • 1 small zucchini, diced
    • 1/2 medium onion, chopped
    • 4 ounces firm tofu, cubed
    • 4 ounces mushrooms, sliced
    • 1 garlic clove, minced
    • 1 green onion, sliced
    • 1 green chile or jalapeño, sliced, optional
    • 1 teaspoon sesame oil, optional
    • Steamed rice, for serving

    👩‍🍳 How to Make Doenjang Jjigae Step by Step

    1. Prepare the broth 🥣
      Pour the anchovy-kelp broth or vegetable broth into a medium pot or Korean stone bowl. Bring it to a gentle simmer over medium-high heat. A seaweed-based broth gives the stew an especially traditional, clean umami flavor.
    2. Dissolve the soybean paste 🌰
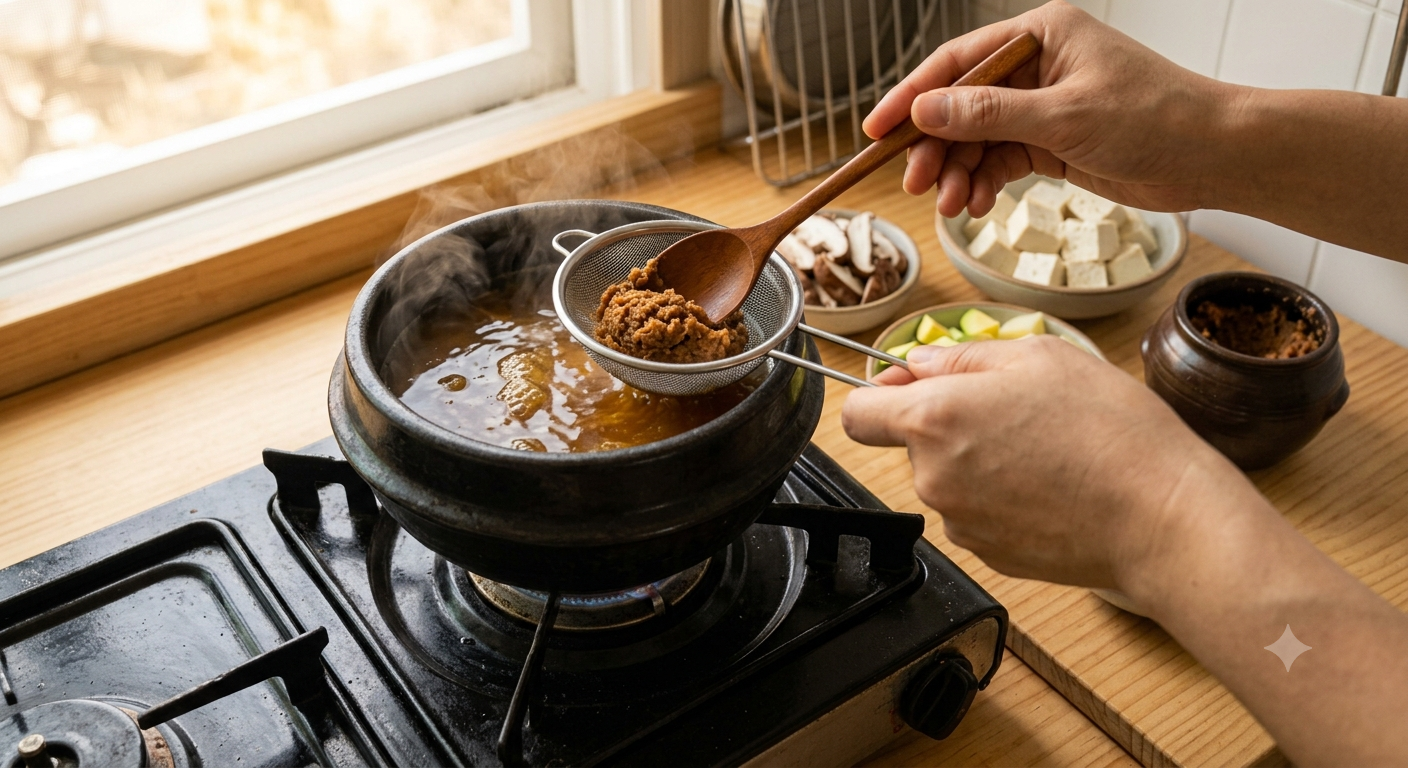
      Place the doenjang in a small sieve over the simmering broth. Use a spoon to press it through the sieve, breaking up any lumps. This creates a smoother broth while leaving behind larger soybean solids, if desired.
    3. Add the hearty vegetables 🥔
      Stir in the diced potato, onion, and garlic. Simmer for 8 to 10 minutes, until the potato begins to soften. For a slightly spicy, more vibrant broth, add the gochujang now.
    4. Add zucchini and mushrooms 🍄
      Add the zucchini and mushrooms. Continue simmering for about 5 minutes. The zucchini should be tender but still hold its shape, while the mushrooms add a savory, woodsy note.
    5. Finish with tofu and fresh aromatics ✨
      Gently add the tofu cubes, green onion, and sliced chile. Simmer for another 2 to 3 minutes. Avoid stirring aggressively so the tofu stays intact.
    6. Taste and serve hot 🍚
      Taste before adding salt; doenjang is naturally salty. Add a few drops of sesame oil for extra richness, if desired. Serve immediately with steamed rice and Korean side dishes.

    🌿 Health Benefits and Smart Cooking Tips

    Because it is made with fermented soybeans, doenjang provides plant-based protein and naturally occurring fermented-food compounds. Combined with tofu and vegetables, this stew can be a nourishing, balanced meal. It is also naturally easy to adapt for vegetarian and vegan diets when made with vegetable or kelp broth.

    • Choose authentic doenjang: Korean doenjang is different from Japanese miso; it is generally earthier, chunkier, and more assertive.
    • Control sodium: Start with less paste, then add more after tasting. Use unsalted homemade broth when possible.
    • Make it heartier: Add thinly sliced pork belly, beef brisket, clams, shrimp, or canned tuna.
    • Use seasonal vegetables: Radish, spinach, napa cabbage, Korean squash, and oyster mushrooms all work beautifully.
    • Serve immediately: Doenjang Jjigae is best enjoyed piping hot, ideally while it is still gently bubbling.

    ❓ Doenjang Jjigae FAQ

    What is the difference between doenjang and miso?

    Both are fermented soybean pastes, but doenjang usually has a stronger, saltier, earthier flavor and a coarser texture than Japanese miso. For authentic Korean soybean paste stew, use Korean doenjang whenever possible.

    Can I make Doenjang Jjigae vegetarian or vegan?

    Yes. Use vegetable broth, mushroom broth, or kelp broth instead of anchovy stock. Check the label on your doenjang, as most traditional varieties are plant-based, but ingredients can vary by brand.

    What meat is best for Doenjang Jjigae?

    Thinly sliced pork belly is a popular choice because its richness balances the fermented soybean flavor. Beef brisket, shaved beef, and seafood such as clams or shrimp are also excellent additions.

    Can I make this Korean stew ahead of time?

    Yes. The broth develops even more flavor after resting overnight. Store it in an airtight container in the refrigerator for up to 3 days, then reheat gently. For the best tofu texture, add fresh tofu when reheating.

    What can I substitute for zucchini?

    Korean zucchini, yellow squash, eggplant, napa cabbage, radish, or green beans are all useful substitutes. Choose vegetables that can simmer without becoming overly soft.

    🥢 Recommended Ingredients

    Bring authentic Korean flavor to your table with fresh, high-quality doenjang, kelp broth ingredients, tofu, and gochujang for a deeply satisfying homemade stew.

    👉 Shop Fresh Ingredients on Amazon

    🍲 Recommended Kitchen Tools

    A traditional Korean stone bowl, or ddukbaegi, keeps Doenjang Jjigae hot from stove to table and creates that irresistible bubbling finish.

    👉 Check Out Essential Cooking Tools on Amazon

    * Disclaimer: As an Amazon Associate, I earn from qualifying purchases at no additional cost to you.

    TAGS: #DoenjangJjigae, #KoreanFood, #KoreanStew, #FermentedFoods, #ComfortFood

  • Eomuk-tang: Hearty Korean Fish Cake Soup on Skewers in Warm Savory Broth

    Eomuk-tang: Hearty Korean Fish Cake Soup on Skewers in Warm Savory Broth

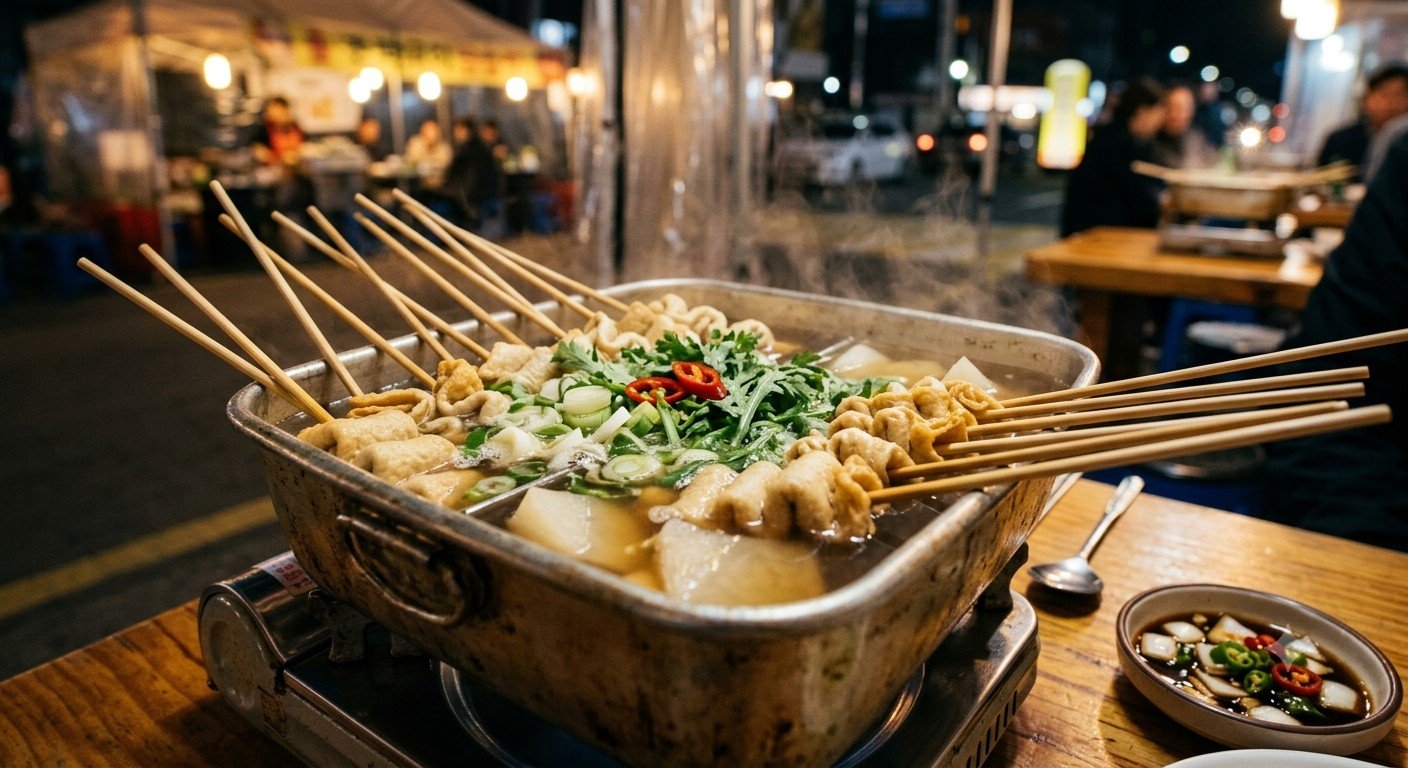
    Few Korean street foods are as comforting as Eomuk-tang, a steaming bowl of savory broth filled with tender fish cake skewers. Served from bubbling street-stall pots across Korea, this simple soup delivers a deeply satisfying combination of umami-rich anchovy-kelp stock, springy eomuk, and bright scallion flavor. It is the kind of warming dish that turns a chilly afternoon into a cozy occasion. 🍢🍲

    📜 The Traditional Story Behind Korean Eomuk-tang

    Eomuk-tang, also called odeng-guk, is Korea’s beloved fish cake soup. Although fish cakes were influenced by Japanese oden, Korean eomuk developed its own distinct identity through flavorful seafood-based fish cakes and a clean, aromatic broth made with dried anchovies, kelp, radish, and sometimes dried shrimp.

    It became especially popular as an affordable, filling Korean street food. Vendors traditionally thread folded fish cake sheets onto wooden skewers, then simmer them in large communal pots. Diners often enjoy the skewers with a cup of broth on the side, adding soy sauce, mustard, or chili for extra punch. Today, homemade Eomuk-tang remains a favorite easy Korean comfort meal for busy weeknights, late-night snacks, and cold-weather dinners.

    🍲 Easy Eomuk-tang Recipe: Korean Fish Cake Soup

    This recipe makes approximately 4 comforting servings. Use assorted Korean fish cakes for the best texture: folded sheets, balls, bars, and vegetable-studded varieties all work beautifully.

    Ingredients

    • 12 ounces Korean fish cakes (eomuk), assorted shapes
    • 6 to 8 wooden skewers, soaked in water for 20 minutes
    • 6 cups water
    • 1 small Korean radish or daikon radish, cut into thick slices
    • 8 to 10 dried anchovies, heads and innards removed
    • 1 piece dried kelp (dashima), about 4 x 4 inches
    • 2 garlic cloves, lightly crushed
    • 1 tablespoon soup soy sauce or light soy sauce
    • 1 teaspoon salt, plus more to taste
    • 2 scallions, sliced
    • Optional: Korean radish, mushrooms, chili slices, mustard, or dipping soy sauce

    👩‍🍳 Step-by-Step Preparation

    1. Make the broth base. Add water, radish, dried anchovies, kelp, and garlic to a medium pot. Bring everything to a gentle boil over medium-high heat. 🌊
    2. Simmer for clean umami flavor. Once boiling, remove the kelp after 5 minutes so the broth does not become slimy or bitter. Continue simmering the anchovies and radish for 15 to 20 minutes.
    3. Strain and season. Remove the anchovies and garlic. Keep the softened radish in the pot, then season the broth with soup soy sauce and salt. Taste it: the flavor should be light, savory, and pleasantly seafood-forward.
    4. Prepare the fish cake skewers. Fold large fish cake sheets into loose zigzags and thread them onto soaked wooden skewers. Add fish balls or smaller pieces between folds if desired. Do not pack the skewers too tightly, as loose folds soak up more broth.
    5. Warm the eomuk. Slide the skewers into the simmering broth. Cook for 5 to 7 minutes, until the fish cakes are plump, hot, and tender. 🍢
    6. Finish and serve. Add sliced scallions during the final minute. Serve each bowl with one or two skewers, plenty of hot broth, radish slices, and optional dipping sauce.

    💚 Health Benefits and Smart Cooking Tips

    Eomuk-tang is a lighter comfort food compared with many fried snacks. Fish cakes provide protein, while the anchovy-and-kelp broth contributes minerals and satisfying umami without relying heavily on oil. Radish adds gentle sweetness, hydration, and a crisp vegetable element.

    • Choose quality eomuk: Look for Korean fish cakes with a high fish content and fewer unnecessary fillers.
    • Control sodium: Fish cakes and soy sauce can be salty, so season the broth gradually and taste before adding more salt.
    • Boost the vegetables: Add napa cabbage, bok choy, mushrooms, or zucchini for a more complete meal.
    • Keep it warm: Eomuk-tang is best served immediately, but the broth can stay on very low heat for relaxed sharing.

    ❓ Eomuk-tang FAQ

    What is the best fish cake for Eomuk-tang?

    Assorted Korean fish cakes are best for Eomuk-tang. Look for flat sheets for folding onto skewers, plus fish balls or rectangular bars for variety. Korean grocery stores often sell mixed eomuk packs specifically made for soup or oden-style dishes.

    Can I make Korean fish cake soup ahead of time?

    Yes. Prepare the anchovy-kelp broth up to 2 days ahead and refrigerate it in an airtight container. Reheat the broth and add the fish cake skewers just before serving, since eomuk tastes best when freshly warmed and springy.

    Can I make Eomuk-tang without anchovies?

    Absolutely. Use vegetable broth, kombu broth, or a light chicken broth instead. For a vegetarian-style version, choose plant-based fish cakes or replace them with tofu, mushrooms, and rice cakes.

    Why should I remove kelp early from the broth?

    Dried kelp releases savory glutamates quickly. Removing it after about 5 minutes gives the broth deep umami while preventing an overly strong, slippery, or bitter flavor.

    What do you serve with Eomuk-tang?

    Serve it with steamed rice, kimchi, pickled radish, or a small dipping sauce made with soy sauce, vinegar, sesame seeds, and Korean chili flakes. For an authentic street-food feel, enjoy the broth in a cup alongside the skewers.

    🥢 Recommended Ingredients

    Bring authentic Korean street-food flavor home with quality fish cakes, dried anchovies, kelp, and soup soy sauce for a beautifully savory Eomuk-tang broth.

    👉 Shop Fresh Ingredients on Amazon

    🍲 Recommended Kitchen Tools

    Make serving easy and authentic with sturdy wooden skewers, a deep soup pot, and a fine strainer for clear, flavorful broth.

    👉 Check Out Essential Cooking Tools on Amazon

    * Disclaimer: As an Amazon Associate, I earn from qualifying purchases at no additional cost to you.

    TAGS: #EomukTang, #KoreanFood, #FishCakeSoup, #KoreanStreetFood, #ComfortFood

  • Kimchi Bokkeumbap: Ultimate Korean Kimchi Fried Rice with Crispy Edge and Fried Egg

    Kimchi Bokkeumbap: Ultimate Korean Kimchi Fried Rice with Crispy Edge and Fried Egg

    Bold, smoky, tangy, and irresistibly comforting, Kimchi Bokkeumbap is the Korean fried rice that turns humble leftovers into a restaurant-worthy meal. The magic lies in well-fermented kimchi, hot rice, and a skillet that creates those coveted crispy caramelized rice edges. Finish it with a runny fried egg, and every bite becomes spicy, savory, creamy, and deeply satisfying.

    📜 History of Kimchi Bokkeumbap

    Kimchi Bokkeumbap (김치볶음밥) literally means “kimchi stir-fried rice.” It is a beloved Korean home-style dish born from the practical, resourceful tradition of using leftover rice and aged kimchi. In Korean kitchens, rice is rarely wasted, and kimchi that has fermented for longer develops a sharper, richer flavor ideal for cooking.

    While kimchi itself has roots stretching back centuries in Korea, kimchi fried rice became especially popular as a quick everyday meal during the modern era. Today, it is found everywhere—from family tables and school cafeterias to Korean snack bars known as bunsikjip. Its universal appeal comes from its flexibility: add pork belly, bacon, tuna, tofu, cheese, or simply enjoy it as a plant-forward bowl with a sunny fried egg.

    🛒 Ingredients for Korean Kimchi Fried Rice

    • 3 cups cold cooked short-grain rice, preferably day-old
    • 1 1/2 cups well-fermented napa cabbage kimchi, chopped
    • 2 tablespoons kimchi brine or kimchi juice
    • 4 ounces pork belly, bacon, ham, tofu, or canned tuna
    • 1 small onion, finely diced
    • 2 green onions, sliced, divided
    • 1 tablespoon gochujang (Korean red pepper paste)
    • 1 teaspoon soy sauce
    • 1 teaspoon toasted sesame oil
    • 2 tablespoons neutral cooking oil, divided
    • 2 eggs
    • 1 teaspoon toasted sesame seeds
    • Roasted seaweed strips, optional, for garnish

    🔥 How to Make Kimchi Bokkeumbap Step by Step

    1. Prepare the rice. Break up cold rice with clean hands or a spoon so there are no large clumps. Day-old rice is the secret to fried rice with separate, chewy grains rather than a soft, sticky texture.
    2. Cook your protein 🥓 Heat a large nonstick or cast-iron skillet over medium-high heat. Add 1 tablespoon oil, then cook pork belly, bacon, ham, tofu, or tuna until heated through and lightly browned. Transfer to a plate if the pan becomes crowded.
    3. Sauté the aromatics. Add the remaining oil, followed by onion and the white parts of the green onions. Stir-fry for 2 to 3 minutes until fragrant and lightly softened.
    4. Caramelize the kimchi 🌶️ Add chopped kimchi and cook for 3 to 4 minutes. Let it sit against the hot pan briefly between stirs. This concentrates the flavor and mellows the raw acidity while building a savory, slightly smoky base.
    5. Add sauce and rice. Stir in gochujang, soy sauce, and kimchi brine. Add the cold rice and cooked protein. Toss and press the rice into the skillet until every grain is coated in the red-orange kimchi seasoning.
    6. Create the crispy edge ✨ Drizzle sesame oil around the perimeter of the pan. Spread the rice into an even layer and let it cook undisturbed for 2 to 4 minutes. The bottom and edges should turn lightly golden and crisp. For extra crunch, resist stirring too soon.
    7. Fry the eggs 🍳 In a separate pan, fry the eggs in a little oil until the whites are set and the yolks remain runny. A crisp-edged sunny-side-up egg is especially delicious here.
    8. Serve immediately. Divide the kimchi fried rice between bowls. Top each serving with a fried egg, green onion tops, sesame seeds, and optional roasted seaweed. Break the yolk over the hot rice just before eating.

    🌿 Health Benefits and Smart Cooking Tips

    Kimchi offers beneficial live cultures when unheated, plus fiber and vitamins from fermented vegetables. Although cooking reduces some probiotic activity, it still delivers the distinctive flavor and nutrients that make this dish so satisfying. Eggs provide protein, while adding tofu or lean pork can make the meal more filling.

    • Use aged kimchi: Sour, mature kimchi makes the best fried rice because it has bolder flavor and more cooking-friendly acidity.
    • Control the heat: Start with less gochujang if your kimchi is very spicy, then add more at the table.
    • For a vegan version: Use tofu or mushrooms, skip the egg, and check that your kimchi contains no fish sauce or shrimp paste.
    • For maximum crispiness: Use a wide heavy skillet and avoid overfilling it.

    ❓ Kimchi Bokkeumbap FAQ

    What is the best rice for kimchi fried rice?

    Cold, cooked Korean or Japanese short-grain rice is ideal because it stays pleasantly chewy. Medium-grain rice also works well. Avoid freshly steamed rice unless you spread it on a tray and chill it first.

    Can I make Kimchi Bokkeumbap with fresh kimchi?

    Yes, but aged kimchi is better. If your kimchi tastes mild and fresh, add a little extra kimchi brine, a small splash of rice vinegar, or another teaspoon of gochujang to deepen the flavor.

    What meat is best in Korean kimchi fried rice?

    Pork belly is a classic choice because its rendered fat enriches the rice. Bacon is an easy alternative, while canned tuna, diced ham, ground pork, chicken, shrimp, or beef all work well.

    Can I make kimchi fried rice ahead of time?

    Yes. Refrigerate cooled leftovers in an airtight container for up to 3 days. Reheat in a hot skillet with a teaspoon of oil to restore the crisp texture, then fry a fresh egg to serve on top.

    How do I prevent kimchi fried rice from becoming soggy?

    Use cold rice, drain excessively wet kimchi before chopping, cook over medium-high heat, and avoid stirring constantly. Giving the rice time to contact the pan is essential for a crisp finish.

    Recommended Ingredients 🥬

    Bring authentic Korean flavor to your kitchen with vibrant aged kimchi, savory gochujang, toasted sesame oil, and premium short-grain rice.

    👉 Shop Fresh Ingredients on Amazon

    Recommended Kitchen Tools 🍳

    A wide, heavy skillet makes all the difference when you want deeply flavored rice and those signature crispy golden edges.

    👉 Check Out Essential Cooking Tools on Amazon

    * Disclaimer: As an Amazon Associate, I earn from qualifying purchases at no additional cost to you.

    TAGS: #KimchiBokkeumbap, #KoreanFriedRice, #KimchiRecipe, #KoreanFood, #EasyDinner

  • Tteokguk: Comforting Korean Sliced Rice Cake Soup in Savory Beef Broth

    Tteokguk: Comforting Korean Sliced Rice Cake Soup in Savory Beef Broth

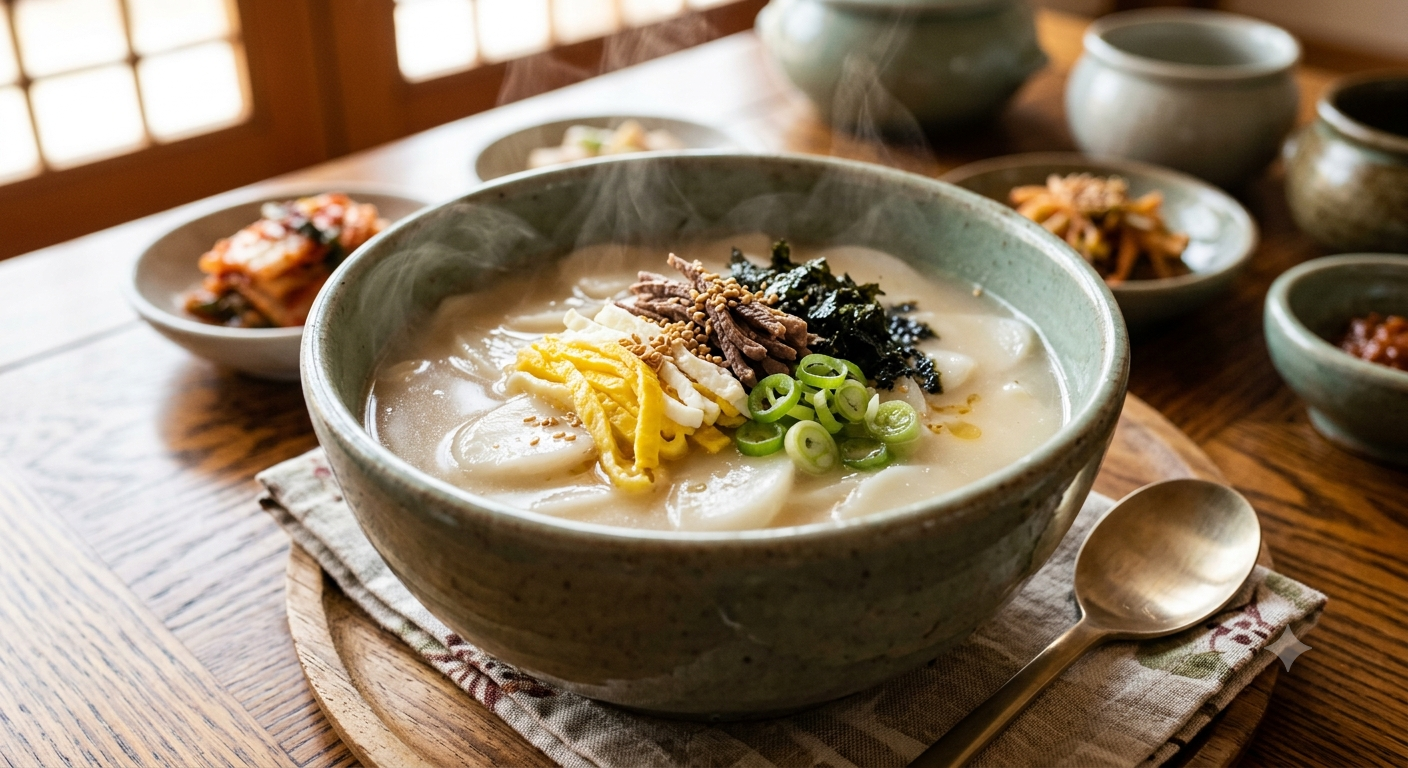
    Few soups feel as hopeful as tteokguk, Korea’s beloved sliced rice cake soup. With chewy oval rice cakes floating in a clear, savory beef broth, this comforting bowl is traditionally enjoyed on New Year’s Day—but its gentle warmth makes it perfect for any chilly evening. Finished with silky egg ribbons, toasted seaweed, and fresh green onion, tteokguk is simple food with deep cultural meaning. 🍲

    📜 The History and Meaning of Tteokguk

    Tteokguk (떡국) has been part of Korean New Year celebrations for centuries. The dish is traditionally eaten during Seollal, the Korean Lunar New Year, when families gather to honor ancestors, share a meal, and welcome a fresh start. In Korean culture, people often jokingly ask, “How many bowls of tteokguk have you eaten?” as a playful way of asking someone’s age.

    The soup’s oval garaetteok rice cake slices are said to resemble old Korean coins, symbolizing prosperity and good fortune. Their bright white color also represents purity and renewal. While versions vary by region and household, a clear beef broth remains one of the most classic and satisfying foundations for this iconic Korean comfort food.

    🥣 Ingredients for Traditional Beef Tteokguk

    • 12 ounces sliced Korean rice cakes for soup (tteokguk-tteok)
    • 8 ounces beef brisket, flank steak, or sirloin, thinly sliced
    • 6 cups beef broth or water
    • 2 garlic cloves, minced
    • 1 tablespoon soy sauce, plus more to taste
    • 1 teaspoon toasted sesame oil
    • 1 teaspoon fish sauce or Korean soup soy sauce (guk-ganjang), optional
    • 2 eggs, separated
    • 2 green onions, thinly sliced
    • 1 sheet roasted seaweed, cut into thin strips
    • Salt and black pepper, to taste

    👩‍🍳 How to Make Tteokguk Step by Step

    1. Soak the rice cakes. Place the sliced rice cakes in a bowl of cool water for 15 to 20 minutes. This helps soften refrigerated or frozen rice cakes and prevents them from cooking unevenly. Drain well before using. 💧
    2. Season the beef. Toss the sliced beef with sesame oil, half the minced garlic, a pinch of salt, and black pepper. Let it sit for about 10 minutes while you prepare the remaining ingredients.
    3. Make a flavorful beef base. Heat a soup pot over medium heat. Add the seasoned beef and stir-fry for 2 to 3 minutes until lightly browned. This quick step creates a richer, more deeply savory broth. 🥩
    4. Simmer the broth. Pour in the beef broth or water, then add the remaining garlic, soy sauce, and optional fish sauce or Korean soup soy sauce. Bring to a gentle boil, skimming off any foam for a clear broth. Simmer for 10 minutes.
    5. Cook the rice cakes. Add the drained rice cake slices to the simmering broth. Cook for 4 to 6 minutes, stirring occasionally, until the slices are tender, glossy, and pleasantly chewy. Avoid overcooking, as they can become too soft.
    6. Create the egg garnish. For a traditional presentation, whisk egg whites and yolks separately. Cook each in a lightly oiled nonstick pan as thin omelets, then slice into delicate strips. For an easier method, gently stream beaten whole egg into the soup and let it set into ribbons. 🍳
    7. Finish and serve. Taste the broth and adjust with salt or soy sauce. Ladle the tteokguk into warm bowls and top with egg strips, green onions, and roasted seaweed. Serve immediately for the best texture.

    🌿 Health Benefits and Smart Cooking Tips

    Tteokguk is a nourishing meal built around simple ingredients. Beef provides protein, iron, zinc, and vitamin B12, while eggs add satisfying protein and essential nutrients. Green onions and garlic contribute aromatic flavor along with beneficial plant compounds. Rice cakes are naturally gluten-free when made from rice, though always check packaging for added ingredients or cross-contact information.

    • For the clearest broth: simmer gently rather than boiling aggressively, and skim foam as needed.
    • For frozen rice cakes: soak them in cool water until separated before adding them to the soup.
    • For a lighter bowl: use lean beef and low-sodium broth, then season gradually.
    • For extra comfort: add dumplings (mandu) for a heartier tteok mandu guk.

    ❓ Tteokguk FAQ

    What is the best cut of beef for tteokguk?

    Brisket is a traditional choice because it creates a rich, beefy flavor. Thinly sliced flank steak, sirloin, or shaved ribeye also work beautifully and cook quickly. Use lean, tender beef sliced across the grain for the best texture.

    Can I make tteokguk ahead of time?

    Yes, but store the broth and rice cakes separately when possible. Cooked rice cakes continue absorbing liquid and can become overly soft. Refrigerate the broth for up to 3 days, then reheat it and cook fresh or soaked rice cakes just before serving.

    Can I use chicken broth instead of beef broth?

    Absolutely. Chicken broth makes a lighter but still delicious tteokguk. You can also use anchovy-kelp broth for a traditional seafood-forward Korean flavor, or vegetable broth for a vegetarian version.

    How do I keep Korean rice cakes from sticking together?

    Soak the slices in cool water first, then add them gradually to simmering broth while stirring gently. Do not overcrowd the pot, and serve soon after cooking for their ideal chewy texture.

    Is tteokguk gluten-free?

    The rice cakes themselves are often gluten-free, but soy sauce and some packaged broths may contain wheat. Choose certified gluten-free soy sauce or tamari and verify every packaged ingredient if you need a fully gluten-free tteokguk.

    🥢 Recommended Ingredients

    Bring authentic Korean flavor to your kitchen with fresh sliced rice cakes, roasted seaweed, toasted sesame oil, and Korean soup soy sauce for a deeply satisfying bowl of tteokguk.

    👉 Shop Fresh Ingredients on Amazon

    🍲 Recommended Kitchen Tools

    A sturdy soup pot, fine ladle, sharp knife, and nonstick skillet make preparing clear broth and elegant egg garnishes easy and enjoyable.

    👉 Check Out Essential Cooking Tools on Amazon

    * Disclaimer: As an Amazon Associate, I earn from qualifying purchases at no additional cost to you.

    TAGS: #Tteokguk, #KoreanFood, #RiceCakeSoup, #ComfortFood, #KoreanNewYear