Author: whipiry@gmail.com

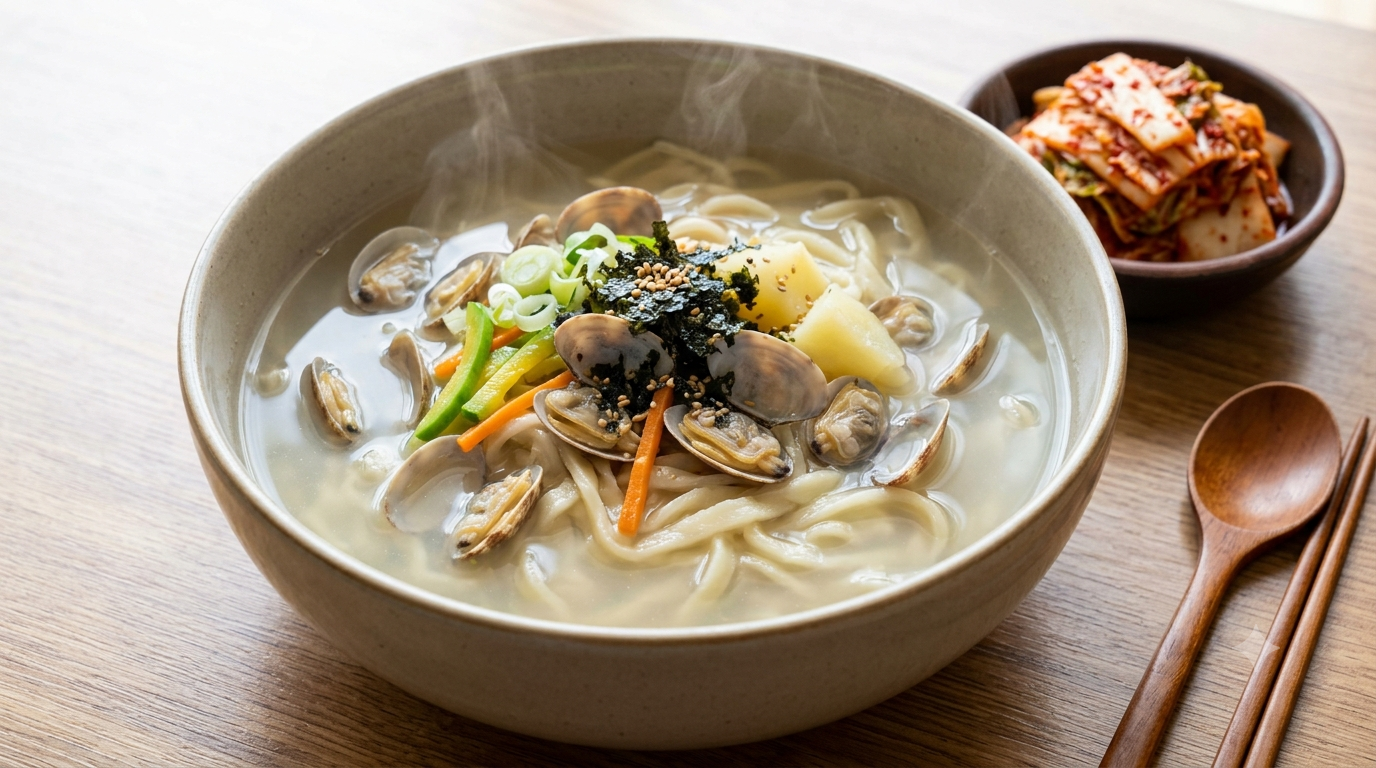
  • Kalguksu: Comforting Korean Knife-Cut Noodle Soup in Rich, Savory Broth

    Kalguksu: Comforting Korean Knife-Cut Noodle Soup in Rich, Savory Broth

    Kalguksu: Comforting Korean Knife-Cut Noodle Soup in a Rich, Savory Broth 🍜

    Few bowls are as soothing as Kalguksu, Korea’s beloved knife-cut noodle soup. With its tender, rustic wheat noodles, clear yet deeply savory broth, and simple seasonal vegetables, this dish turns humble pantry ingredients into pure comfort. Whether you need a warming rainy-day meal or a nourishing homemade lunch, Korean kalguksu delivers a silky, slurpable bowl with unforgettable depth.

    📜 The History of Korean Kalguksu

    The name kalguksu literally means “knife noodles”: kal means knife, while guksu means noodles. Rather than being extruded or pulled, the dough is rolled thin, folded, and sliced by hand into uneven ribbons. That handmade texture is part of what makes authentic kalguksu so special.

    Historically, wheat was once a valuable ingredient in Korea, so noodle dishes were often reserved for celebrations, harvest gatherings, and special family meals. Over time, kalguksu became a familiar everyday comfort food, especially during Korea’s humid monsoon season. Today, regional versions range from chicken-based dak kalguksu to seafood-rich coastal broths and boldly flavored spicy variations.

    🥣 Classic Kalguksu Recipe: Ingredients

    This easy Korean noodle soup recipe uses store-bought fresh knife-cut noodles for convenience while keeping the broth full-bodied and traditional.

    • 8 cups chicken broth or anchovy-kelp stock
    • 1 tablespoon soy sauce
    • 1 teaspoon fish sauce, optional
    • 2 cloves garlic, finely minced
    • 10 ounces fresh Korean kalguksu noodles
    • 1 small zucchini, cut into thin matchsticks
    • 1 medium potato, peeled and cut into thin matchsticks
    • 1 small onion, thinly sliced
    • 1 cup shredded cooked chicken, optional
    • 2 green onions, thinly sliced
    • Salt and black pepper, to taste
    • Kimchi, sesame seeds, and chili flakes for serving

    👩‍🍳 How to Make Kalguksu Step by Step

    1. Build the savory broth. 🫕 Pour the chicken broth or anchovy-kelp stock into a large pot. Add soy sauce, fish sauce if using, and minced garlic. Bring everything to a gentle boil over medium-high heat.

    2. Cook the vegetables. 🥔 Add the potato and onion first. Simmer for 5 to 6 minutes, until the potato begins to soften. Add the zucchini and cook for another 2 minutes. This layered cooking keeps the vegetables tender but not mushy.

    3. Add chicken for a heartier bowl. 🍗 Stir in shredded cooked chicken if desired. Rotisserie chicken is an excellent time-saving option, while poached chicken breast gives the broth a lighter finish.

    4. Prepare the fresh noodles. 🍜 Gently loosen the kalguksu noodles with your hands. If they are heavily dusted with flour, rinse them quickly under cold water; this helps create a cleaner, less cloudy broth.

    5. Cook the noodles. Add the noodles to the simmering broth and stir immediately to prevent sticking. Cook for 4 to 6 minutes, or according to the package directions, until the noodles are tender with a pleasantly chewy bite.

    6. Season and serve. ✨ Taste the soup and add salt and black pepper as needed. Ladle into warm bowls, scatter with green onions, and serve immediately with kimchi, sesame seeds, or a pinch of Korean chili flakes.

    🌿 Health Benefits and Smart Cooking Tips

    Kalguksu can be a balanced, comforting meal when prepared with a broth rich in vegetables and lean protein. The zucchini and onion contribute vitamins and antioxidants, while potatoes add satisfying carbohydrates and potassium. Chicken supplies protein, helping make the dish more filling and complete.

    • For a lighter kalguksu: use low-sodium broth, skip excess salt, and add more zucchini, mushrooms, napa cabbage, or spinach.
    • For deeper Korean flavor: make anchovy-kelp stock with dried anchovies, dried kelp, Korean radish, and onion.
    • Do not overcook the noodles: fresh knife-cut noodles continue softening in hot broth, so serve them as soon as they are tender.
    • For meal prep: store broth and noodles separately. Reheat the broth, then cook fresh noodles just before serving for the best texture.

    ❓ Kalguksu FAQ

    What are the best noodles for kalguksu?

    Fresh Korean knife-cut noodles, often sold as kalguksu myeon, are the best choice because they have a soft, handmade-style texture. In a pinch, fresh udon or thick wheat noodles can work, although the final bowl will not have the same rustic bite.

    Can I make kalguksu broth ahead of time?

    Yes. The broth can be made up to three days ahead and refrigerated in an airtight container. Reheat it gently, add fresh vegetables if needed, and cook the noodles immediately before serving.

    Can I make vegetarian Korean kalguksu?

    Absolutely. Replace chicken broth with a kelp, mushroom, and vegetable stock. Add shiitake mushrooms, tofu, napa cabbage, and zucchini for a satisfying vegetarian kalguksu with savory umami character.

    Why is my kalguksu broth cloudy?

    A slightly cloudy broth is normal because the noodles release starch as they cook. For a clearer soup, rinse flour-dusted noodles briefly before adding them to the pot and avoid stirring too aggressively.

    What should I serve with kalguksu?

    Baechu kimchi, kkakdugi radish kimchi, seasoned cucumber salad, and simple pan-fried dumplings are excellent pairings. The bright acidity and spice of kimchi beautifully cut through the rich, savory noodle broth.

    🥬 Recommended Ingredients

    Bring authentic Korean comfort to your kitchen with fresh knife-cut noodles, quality anchovy stock ingredients, toasted sesame seeds, and flavorful kimchi.

    👉 Shop Fresh Ingredients on Amazon

    🍲 Recommended Kitchen Tools

    A roomy soup pot, fine noodle strainer, sharp chef’s knife, and sturdy ladle make homemade kalguksu easier, cleaner, and more enjoyable to prepare.

    👉 Check Out Essential Cooking Tools on Amazon

    * Disclaimer: As an Amazon Associate, I earn from qualifying purchases at no additional cost to you.

    TAGS: #Kalguksu, #KoreanFood, #NoodleSoup, #ComfortFood, #KoreanRecipes
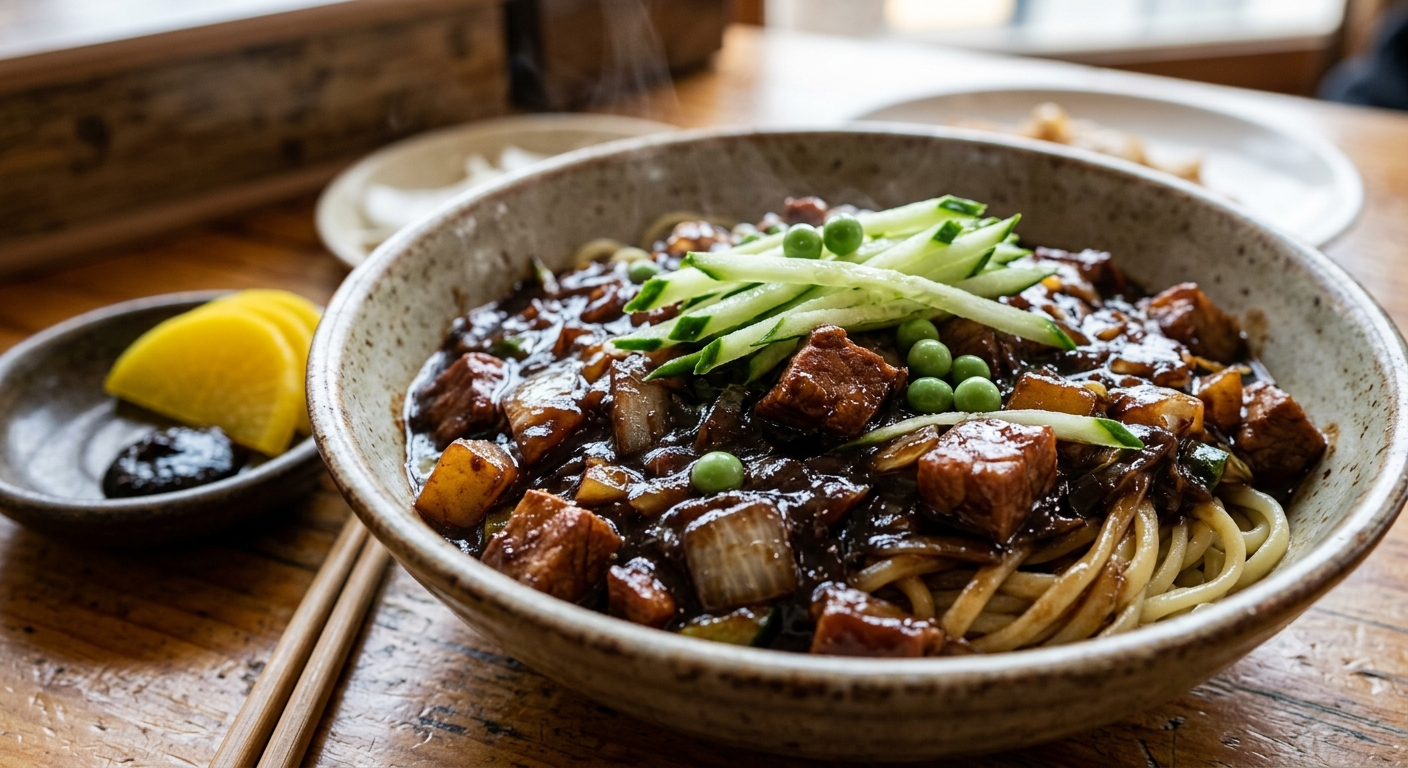
  • Jjajangmyeon: Korean Black Bean Noodles with Deep, Savory Comfort

    Jjajangmyeon: Korean Black Bean Noodles with Deep, Savory Comfort

    Jjajangmyeon: Korean Black Bean Noodles with Deep, Savory Comfort 🍜

    Glossy black sauce, springy noodles, and tender vegetables: jjajangmyeon is one of Korea’s most irresistible comfort foods. This beloved noodle bowl balances savory fermented black bean paste with a gentle sweetness, creating a rich, velvety sauce that clings beautifully to every strand. Whether you are exploring Korean home cooking or craving a restaurant-style meal, this easy jjajangmyeon recipe brings big flavor to your table..

    📜 The History of Jjajangmyeon

    Jjajangmyeon has roots in the Chinese dish zhajiangmian, meaning “fried sauce noodles.” It was introduced to Korea by Chinese immigrants in Incheon during the late 19th and early 20th centuries. Over time, Korean cooks adapted the original recipe using chunjang, a fermented Korean black bean paste with a distinctively roasted, earthy character.

    Today, jjajangmyeon is a Korean-Chinese classic and a cherished symbol of casual celebration. It is famously eaten on Korea’s Black Day, when singles gather on April 14 to enjoy black noodles together. From delivery-food favorite to homemade weeknight dinner, its appeal remains timeless: hearty, affordable, and deeply satisfying.

    🛒 Ingredients for Authentic Jjajangmyeon

    • 12 ounces fresh Korean wheat noodles or udon noodles
    • 3 tablespoons Korean black bean paste (chunjang)
    • 2 tablespoons neutral oil, divided
    • 8 ounces pork belly, pork shoulder, or diced chicken
    • 1 medium onion, diced
    • 1 small zucchini, diced
    • 1 medium potato, peeled and diced
    • 1 cup diced cabbage
    • 1/2 cup diced daikon radish or Korean radish
    • 1 tablespoon sugar
    • 1 tablespoon oyster sauce or soy sauce
    • 1 1/2 cups water or unsalted chicken stock
    • 1 tablespoon cornstarch mixed with 2 tablespoons cold water
    • Cucumber matchsticks, optional, for garnish

    👩‍🍳 How to Make Jjajangmyeon Step by Step

    1. Prepare the black bean paste. Heat 1 tablespoon oil in a wok or deep skillet over medium-low heat. Add the chunjang and stir-fry for 1 to 2 minutes. This quick frying step softens its bitter edge and develops a smoother, richer flavor. Transfer the paste to a small bowl.
    2. Brown the meat 🍖. Add the remaining oil to the pan. Cook the pork belly or pork shoulder over medium-high heat until lightly browned and fragrant, about 4 to 5 minutes. If using lean chicken, add an extra teaspoon of oil to prevent sticking.
    3. Cook the vegetables 🥕. Add onion, zucchini, potato, cabbage, and radish. Stir-fry for 4 minutes, allowing the onion to turn translucent and the vegetables to pick up the savory meat juices.
    4. Build the sauce. Return the fried chunjang to the pan. Add sugar and oyster sauce, stirring until every ingredient is coated in the dark paste. Pour in water or stock, bring to a gentle simmer, and cook for 10 to 12 minutes until the potato is fork-tender.
    5. Thicken until glossy ✨. Stir the cornstarch slurry once more, then slowly pour it into the simmering sauce. Stir continuously for 1 to 2 minutes. The sauce should become thick, shiny, and spoon-coating. Add a splash of water if it becomes too thick.
    6. Boil the noodles. Cook fresh noodles according to package directions, usually 3 to 5 minutes. Drain well and rinse briefly with warm water to remove excess starch while keeping the noodles tender.
    7. Serve immediately. Divide noodles among bowls and ladle the hot black bean sauce generously over the top. Finish with crisp cucumber matchsticks for a fresh contrast. Mix well before eating and enjoy your homemade Korean black bean noodles.

    🌿 Health Benefits and Practical Tips

    Jjajangmyeon is a satisfying meal that can also be made more balanced at home. The sauce includes fiber-rich vegetables such as cabbage, zucchini, onion, and radish, while pork or chicken provides protein. Fermented black bean paste also contributes intense umami, meaning you can use less added salt than in many other savory sauces.

    • For a lighter bowl: Use lean pork loin, chicken breast, turkey, or finely diced mushrooms.
    • For a vegan jjajangmyeon: Replace meat with shiitake mushrooms, firm tofu, or diced eggplant, and use mushroom stock.
    • For better texture: Dice vegetables evenly so the sauce cooks consistently.
    • For authentic flavor: Do not skip frying the chunjang first; it makes a noticeable difference.

    ❓ Jjajangmyeon FAQ

    What is the best meat for jjajangmyeon?

    Pork belly is the traditional choice because its fat enriches the black bean sauce. Pork shoulder is an excellent, less fatty alternative. Chicken thigh, beef, shrimp, tofu, or mushrooms also work well for flexible home cooking.

    Can I make jjajangmyeon ahead of time?

    Yes. Make the sauce up to 3 days ahead and refrigerate it in an airtight container. Reheat gently with a splash of water or stock. Cook the noodles fresh just before serving for the best chewy texture.

    What can I substitute for chunjang?

    Chunjang has a unique roasted, fermented flavor, so it is worth seeking out at a Korean grocery store or online. Chinese sweet bean sauce can work in a pinch, but the flavor will be sweeter and less distinctly Korean. Avoid using regular black bean sauce without tasting first, as salt levels vary greatly.

    Are black bean noodles spicy?

    No. Traditional jjajangmyeon is savory and slightly sweet rather than spicy. If you enjoy heat, serve it with kimchi, sliced fresh chilies, or a small spoonful of Korean chili flakes.

    What noodles should I use for jjajangmyeon?

    Fresh Korean wheat noodles are ideal because they are thick, bouncy, and hold the sauce well. Udon noodles are a convenient substitute. For a lower-carb option, try zucchini noodles, though the final dish will be lighter and less traditional.

    Recommended Ingredients 🥢

    Bring out the authentic, deeply savory character of jjajangmyeon with quality Korean chunjang, fresh noodles, and traditional pantry staples.

    👉 Shop Fresh Ingredients on Amazon

    Recommended Kitchen Tools 🍳

    A deep wok or sturdy skillet makes it easy to stir-fry the chunjang, vegetables, and protein into a glossy, restaurant-worthy sauce.

    👉 Check Out Essential Cooking Tools on Amazon

    * Disclaimer: As an Amazon Associate, I earn from qualifying purchases at no additional cost to you.

    TAGS: #Jjajangmyeon, #KoreanFood, #BlackBeanNoodles, #KoreanRecipe, #ComfortFood

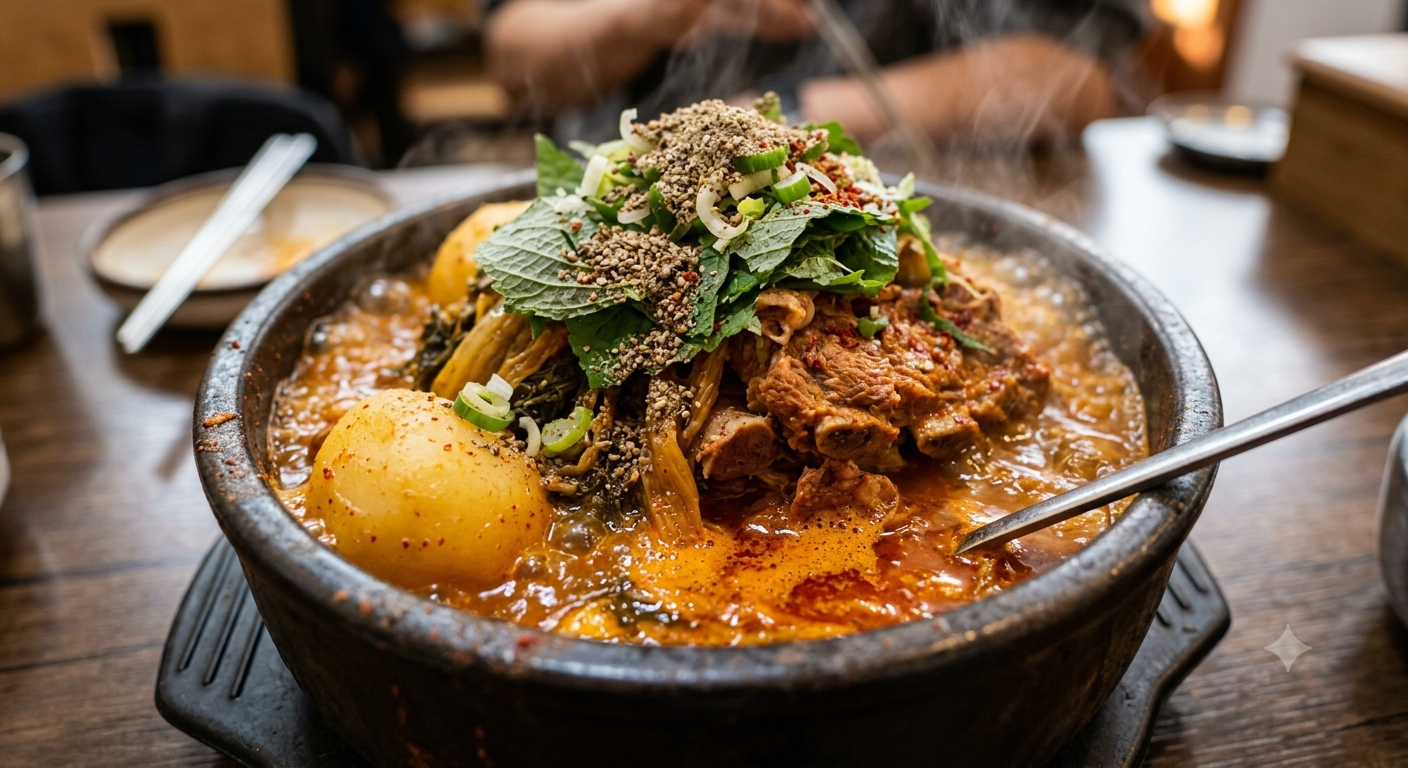
  • Gamjatang: Hearty Korean Pork Bone Soup with Potatoes

    Gamjatang: Hearty Korean Pork Bone Soup with Potatoes

    Gamjatang: Hearty Korean Pork Bone Soup with Potatoes 🍲

    Few dishes capture the comforting spirit of Korean home cooking like Gamjatang, a deeply savory pork bone soup filled with tender potatoes, earthy perilla seed powder, and fragrant greens. Bold, warming, and wonderfully restorative, this traditional Korean stew is the kind of meal that turns a chilly evening into a celebration..

    📜 The History of Gamjatang

    Gamjatang, often translated as Korean pork bone soup, has long been enjoyed as an affordable, filling meal across Korea. Despite the name, “gamja” can refer to more than potatoes; some food historians connect the dish to the pork backbone, which was once called gamja-bone in certain regional dialects. Today, potatoes are an essential part of most versions, soaking up the rich broth and adding satisfying texture.

    The dish became especially popular among laborers, travelers, and late-night diners because pork neck bones create an intensely flavorful broth without requiring expensive cuts of meat. In Korea, Gamjatang is commonly served in large bubbling pots for sharing, often alongside rice, kimchi, and extra perilla leaves. Its signature combination of pork, potatoes, spicy seasoning, and deulkkae garu (perilla seed powder) gives it a uniquely nutty, comforting finish.

    🥔 Authentic Gamjatang Recipe

    This homemade Gamjatang recipe serves 4 to 6 people and delivers a restaurant-style Korean pork bone stew with a rich, aromatic broth.

    Ingredients

    • 3 pounds pork neck bones or pork spine bones
    • 8 cups water, plus more for blanching
    • 4 medium Yukon Gold or russet potatoes, peeled
    • 1 large onion, halved
    • 6 garlic cloves
    • 1-inch piece fresh ginger, sliced
    • 2 tablespoons doenjang (Korean soybean paste)
    • 2 tablespoons gochugaru (Korean red pepper flakes)
    • 1 tablespoon gochujang (Korean red pepper paste)
    • 2 tablespoons soy sauce
    • 1 tablespoon fish sauce
    • 2 tablespoons perilla seed powder
    • 1 bunch napa cabbage or Korean mustard greens, roughly chopped
    • 2 scallions, sliced
    • 1 tablespoon toasted sesame seeds
    • Salt and black pepper, to taste

    Step-by-Step Instructions

    1. 🫧 Soak the pork bones: Place the pork neck bones in a large bowl, cover with cold water, and soak for 30 to 60 minutes. Drain and rinse well. This helps remove excess blood for a cleaner-tasting broth.
    2. 🔥 Blanch the bones: Add the bones to a large stockpot and cover with fresh water. Bring to a vigorous boil for 8 to 10 minutes. Drain the bones, discard the water, and rinse both the bones and pot thoroughly.
    3. 🍲 Build the broth: Return the cleaned bones to the pot. Add 8 cups water, onion, garlic, ginger, and doenjang. Bring to a boil, then reduce to a gentle simmer. Cover partially and cook for 1½ hours, skimming foam as needed.
    4. 🌶️ Season the stew: In a small bowl, combine gochugaru, gochujang, soy sauce, fish sauce, and a few tablespoons of hot broth. Stir into a smooth seasoning paste, then add it to the pot.
    5. 🥔 Add potatoes: Add the peeled potatoes whole or halved, depending on size. Simmer for 25 to 35 minutes, until fork-tender but not falling apart.
    6. 🌿 Finish with greens: Remove the onion and ginger if desired. Add napa cabbage or mustard greens and simmer for 5 to 8 minutes until softened.
    7. ✨ Add the signature nutty finish: Stir in perilla seed powder. Taste and adjust with salt, pepper, or a touch more gochugaru for extra heat.
    8. 🥢 Serve hot: Ladle the Gamjatang into deep bowls. Garnish with scallions and sesame seeds, then serve immediately with steamed rice and kimchi.

    💚 Health Benefits and Smart Cooking Tips

    Gamjatang is a nourishing one-pot meal packed with protein, minerals, vegetables, and slow-cooked comfort. Pork bones provide protein and gelatin-rich connective tissue, while potatoes offer potassium and satisfying carbohydrates. Garlic, ginger, and Korean chili flakes bring bold flavor along with antioxidant compounds.

    • For a clearer broth: Never skip the soaking and blanching steps.
    • For deeper flavor: Make the stew a day ahead; chilled Gamjatang tastes even richer after reheating.
    • For a less spicy version: Reduce the gochugaru to 1 tablespoon and omit gochujang.
    • For authentic texture: Use pork neck bones with visible meat attached rather than plain soup bones.
    • For a lighter finish: Skim the fat from the broth before adding potatoes and greens.

    ❓ Gamjatang FAQ

    What are the best pork bones for Gamjatang?

    Pork neck bones are the best choice because they offer a balance of meat, marrow, cartilage, and fat. Pork spine bones are also traditional and work well. Ask a Korean butcher or Asian market for pork bones specifically suited for Gamjatang.

    Can I make Gamjatang ahead of time?

    Yes. Gamjatang is an excellent make-ahead Korean stew. Prepare it up to two days in advance, refrigerate it, and reheat gently on the stove. For best potato texture, you can cook the broth ahead and add fresh potatoes when reheating.

    What can I substitute for perilla seed powder?

    Perilla seed powder has a distinctive nutty flavor and is highly recommended. If unavailable, finely ground toasted sesame seeds can add nuttiness, although the flavor will not be identical. Avoid using peanut butter, which changes the dish too dramatically.

    Is Gamjatang spicy?

    Traditional Gamjatang is moderately spicy, but you control the heat. Use less gochugaru and gochujang for a milder soup, or add extra chili flakes for a more intense Korean-style kick.

    What should I serve with Gamjatang?

    Serve this Korean pork bone soup with steamed short-grain rice, kimchi, cubed radish kimchi, and simple banchan. A cold cucumber side dish also balances the stew’s rich, spicy broth beautifully.

    Recommended Ingredients 🌿

    Bring authentic Korean depth to your Gamjatang with fresh pork neck bones, aromatic gochugaru, doenjang, and nutty perilla seed powder.

    👉 Shop Fresh Korean Ingredients on Amazon

    Recommended Kitchen Tools 🍲

    A heavy-duty stockpot makes long, gentle simmering easy and gives your Korean pork bone soup the rich flavor it deserves.

    👉 Check Out Essential Cooking Tools on Amazon

    * Disclaimer: As an Amazon Associate, I earn from qualifying purchases at no additional cost to you.

    TAGS: #Gamjatang, #KoreanFood, #PorkBoneSoup, #KoreanRecipe, #ComfortFood


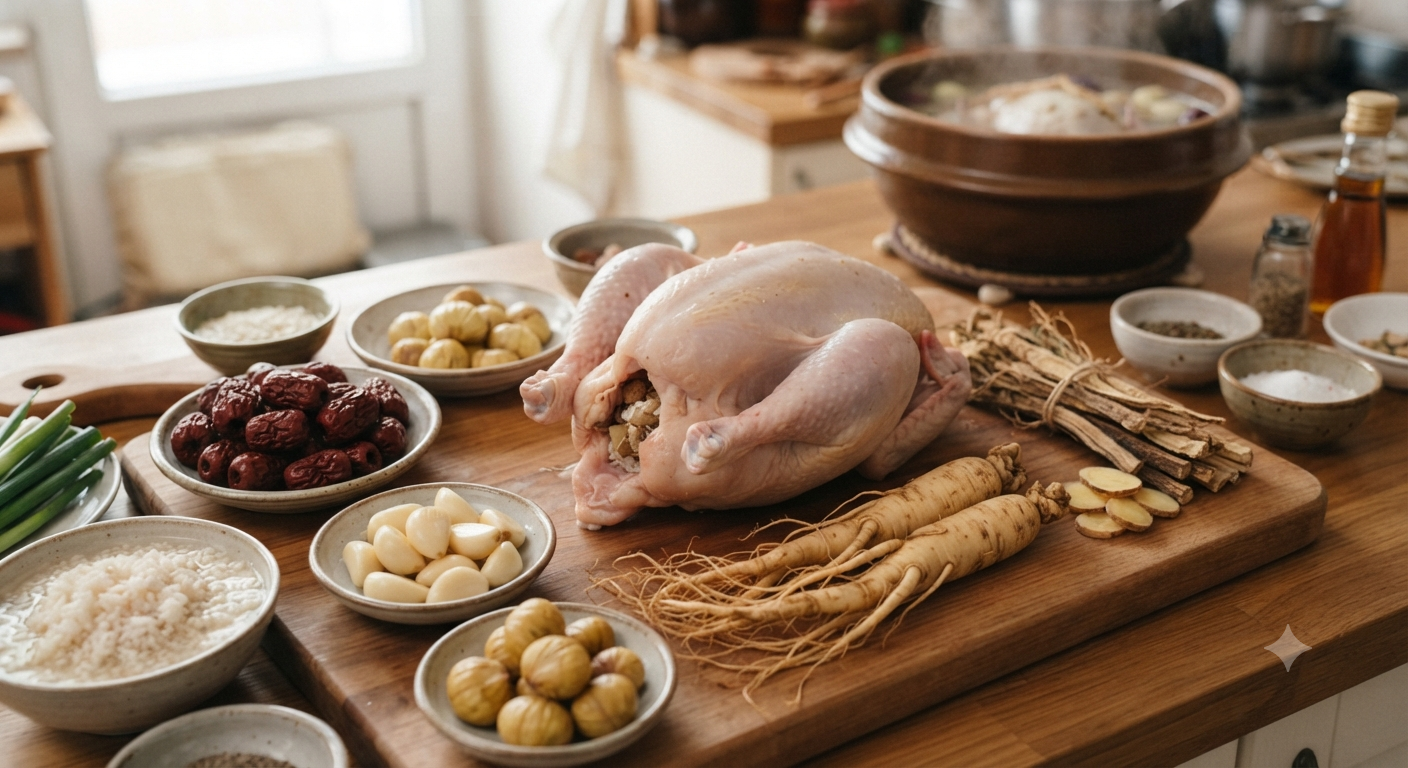
  • Samgyetang: Whole Ginseng Chicken Soup for Vitality and Deep Nourishment

    Samgyetang: Whole Ginseng Chicken Soup for Vitality and Deep Nourishment

    Samgyetang: Whole Ginseng Chicken Soup for Vitality and Deep Nourishment 🍲

    Few dishes feel as restorative as Samgyetang, Korea’s beloved whole ginseng chicken soup. A tender young chicken is gently simmered with sticky rice, garlic, jujubes, and aromatic ginseng until the broth turns silky, savory, and deeply comforting. Served steaming hot, this traditional soup is a beautiful example of food that feels both celebratory and healing.

    📜 The History Behind Korean Samgyetang

    Samgyetang (삼계탕) translates roughly to “ginseng chicken soup.” It is a classic Korean boknal dish, traditionally enjoyed during Korea’s hottest summer days. The idea may sound surprising—why eat hot soup in hot weather? In Korean food culture, warming foods are believed to help the body restore energy depleted by humidity and heat.

    The dish evolved from older chicken soups made with medicinal herbs and eventually became associated with Korean ginseng, prized for its earthy fragrance and traditional reputation as a vitality-supporting root. Today, Samgyetang is served in Korean homes and specialty restaurants worldwide, often with kimchi, salt, pepper, and a small glass of ginseng liquor on the side.

    🥘 Samgyetang Ingredients

    • 2 small whole chickens or Cornish hens, about 1 to 1.25 pounds each
    • 1/2 cup sweet rice or glutinous rice, soaked for 1 hour
    • 2 fresh ginseng roots, washed
    • 6 to 8 garlic cloves
    • 4 dried jujubes (Korean red dates)
    • 2 scallions, plus extra for garnish
    • 8 cups water, plus more as needed
    • Salt and freshly ground black pepper, for serving
    • Optional: sliced ginger, chestnuts, or dried astragalus root

    👩‍🍳 How to Make Whole Ginseng Chicken Soup

    1. Soak the rice 🌾Rinse the sweet rice under cold water until the water runs mostly clear. Cover with water and soak for at least 1 hour. Drain well before using. Soaking helps the rice become creamy and tender inside the chicken.
    2. Prepare the chickens 🐓Remove any excess fat from the cavities and rinse the chickens inside and out. Pat dry. If using Cornish hens, they are especially convenient because each guest can enjoy an individual serving.
    3. Stuff for deep flavor ✨Divide the soaked rice, 4 garlic cloves, 2 jujubes, and a few pieces of ginseng between the chicken cavities. Do not pack them too tightly; the rice expands while cooking. Tuck the legs together or tie them loosely with kitchen twine.
    4. Build the broth 🍲Place the stuffed chickens in a large heavy pot, breast-side up. Add the remaining ginseng, garlic, jujubes, scallions, optional ginger, and 8 cups of water. The chickens should be nearly covered.
    5. Simmer gently ⏳Bring the pot to a boil over medium-high heat. Skim off any foam, then reduce to a gentle simmer. Cover partially and cook for 60 to 75 minutes, adding a little hot water if needed. The chicken is ready when it is exceptionally tender and reaches an internal temperature of 165°F (74°C).
    6. Serve Korean-style 🥄Carefully transfer each chicken to a large bowl and ladle the fragrant broth around it. Garnish with sliced scallions. Serve salt and black pepper at the table so everyone can season their bowl to taste.

    🌿 Health Benefits and Smart Cooking Tips

    Samgyetang offers a satisfying combination of protein-rich chicken, warming broth, garlic, and nourishing carbohydrates from sweet rice. Ginseng has long been used in East Asian food traditions for its energizing qualities, while jujubes add subtle sweetness and a source of antioxidants.

    • For a clearer broth: skim foam during the first 10 minutes of simmering.
    • For richer flavor: use a whole young chicken with skin on; remove skin after cooking if you prefer a lighter meal.
    • For easy prep: soak the rice overnight in the refrigerator.
    • For food safety: refrigerate leftovers within two hours and reheat thoroughly before serving.

    ❓ Samgyetang FAQ

    What is the best chicken to use for Samgyetang?

    Small young chickens, poussins, or Cornish hens are the traditional choice because they cook evenly and fit comfortably in individual bowls. A larger whole chicken also works, but it may need 90 minutes or more to become tender.

    Can I make Samgyetang without fresh ginseng?

    Yes. Dried ginseng, ginseng tea sachets made for cooking, or a Korean Samgyetang herbal kit are practical substitutes. If ginseng is unavailable, make the soup with garlic, ginger, jujubes, and rice for a delicious chicken soup with a similar comforting character.

    Can I make Korean ginseng chicken soup ahead of time?

    Absolutely. Samgyetang often tastes even better the next day. Store the chicken and broth in an airtight container for up to 3 days. Reheat slowly on the stove and add a splash of water if the rice has thickened the broth.

    Is Samgyetang spicy?

    No. Traditional Samgyetang is mild, savory, and gently herbal rather than spicy. If you want heat, serve it with kimchi, gochugaru chili flakes, or a spoonful of Korean chili paste on the side.

    Can I use regular rice instead of glutinous rice?

    You can, but sweet rice creates the signature soft, slightly thickened texture. Short-grain sushi rice is the best substitute; long-grain rice will be less creamy.

    🌿 Recommended Ingredients

    Bring authentic Korean flavor to your table with fragrant ginseng, sweet rice, jujubes, and traditional herbal soup ingredients selected for a deeply nourishing bowl of Samgyetang.

    👉 Shop Fresh Ingredients on Amazon

    🍳 Recommended Kitchen Tools

    A sturdy soup pot, fine skimmer, kitchen twine, and deep serving bowls make this traditional Korean chicken soup easier to prepare and more enjoyable to serve.

    👉 Check Out Essential Cooking Tools on Amazon

    * Disclaimer: As an Amazon Associate, I earn from qualifying purchases at no additional cost to you.

    TAGS: #Samgyetang, #KoreanFood, #GinsengChickenSoup, #ComfortFood, #HealthyRecipes


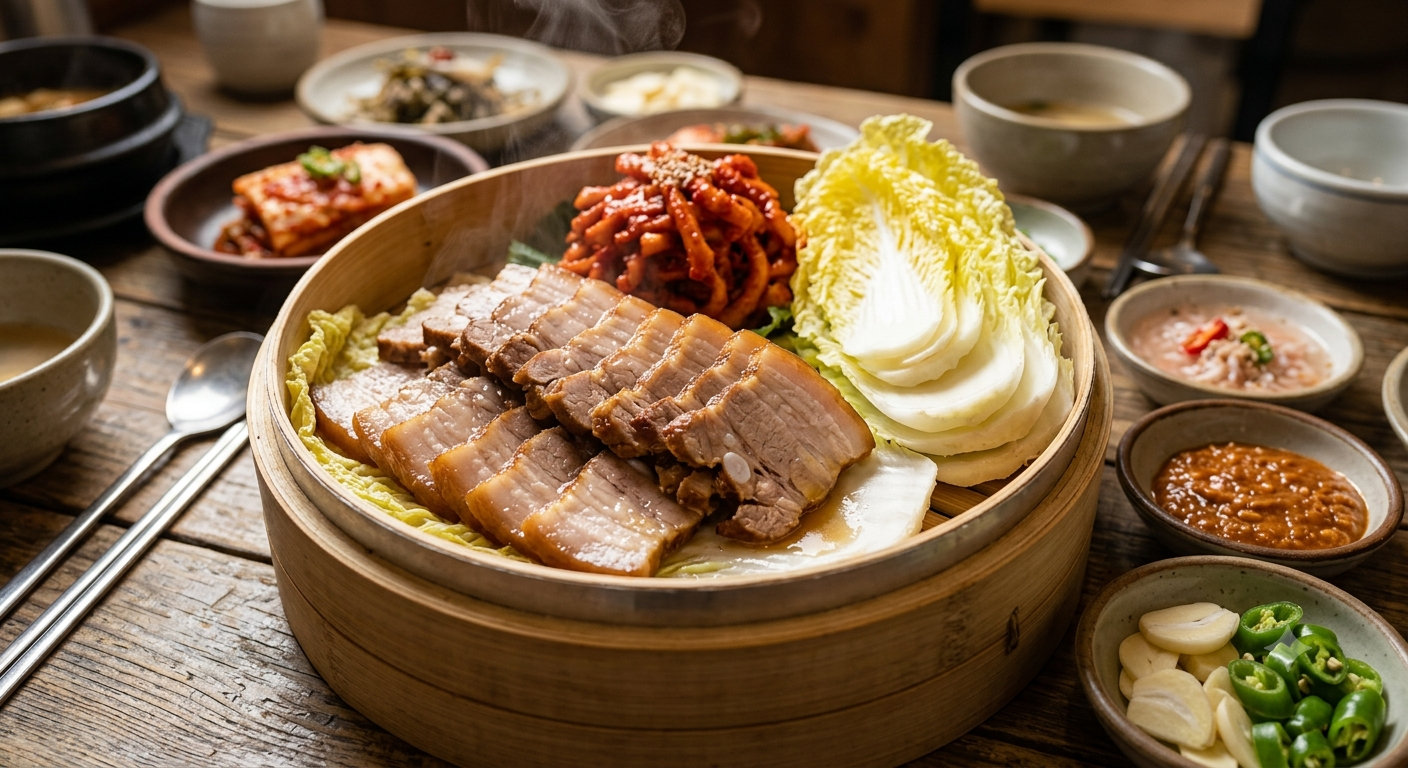
  • Bossam: Korean Boiled Pork Wraps with Fresh Oyster Kimchi 🥬

    Bossam: Korean Boiled Pork Wraps with Fresh Oyster Kimchi 🥬

    Bossam: Korean Boiled Pork Wraps with Fresh Oyster Kimchi 🥬

    Silky, tender pork belly wrapped in crisp napa cabbage, bright kimchi, and savory fermented sauces: Bossam is one of Korea’s most comforting and celebratory shared dishes. The name means “wrapped” or “bundled,” and every bite delivers a satisfying contrast of rich pork, refreshing vegetables, spicy kimchi, and aromatic garlic.

    This approachable Korean bossam recipe creates restaurant-style results at home with gently simmered pork and a vibrant serving platter. It is ideal for family dinners, weekend gatherings, or anyone craving an authentic Korean pork belly meal.

    📜 The History of Bossam

    Bossam has deep roots in Korean home cooking and communal dining culture. Traditionally, pork was simmered with aromatics such as ginger, garlic, soybean paste, coffee, and onion to remove excess richness while keeping the meat exceptionally tender. The cooked pork was then sliced and wrapped in baechu kimchi (napa cabbage kimchi), salted cabbage leaves, or fresh lettuce.

    In Korea, bossam is especially associated with kimjang season, the late-autumn tradition of preparing large batches of kimchi for winter. Freshly made kimchi, often called geotjeori, is commonly served with bossam because its crisp, lively flavor beautifully balances the pork. Today, you can find bossam throughout Seoul and beyond, from casual neighborhood restaurants to festive family tables.

    🛒 Ingredients for Authentic Bossam

    • 2 pounds pork belly, skin-on or skinless
    • 1 small onion, halved
    • 8 garlic cloves, lightly crushed
    • 1-inch piece fresh ginger, sliced
    • 2 tablespoons doenjang (Korean soybean paste)
    • 2 tablespoons instant coffee or brewed coffee
    • 2 tablespoons rice wine or mirin
    • 1 tablespoon brown sugar
    • 1 teaspoon whole black peppercorns
    • 1 napa cabbage, separated into leaves, or butter lettuce
    • 1 cup napa cabbage kimchi
    • ½ cup ssamjang (Korean dipping paste)
    • Steamed rice, sliced raw garlic, green chilies, and salted shrimp sauce for serving

    🍲 How to Make Bossam Step by Step

    1. Prepare the pork. Rinse the pork belly under cold water and pat it dry. If using a very large slab, cut it into two pieces so it fits comfortably in your pot.
    2. Build the aromatic broth. Place the pork in a large, heavy-bottomed pot. Add onion, garlic, ginger, doenjang, coffee, rice wine, brown sugar, and peppercorns. Pour in enough water to cover the pork by about 1 inch.
    3. Bring to a gentle simmer. 🔥 Bring the pot to a boil over medium-high heat. Once boiling, reduce the heat to low. Skim away any foam that rises to the surface for a cleaner broth and pork flavor.
    4. Simmer until tender. Cover partially and cook for 75 to 90 minutes. The pork is ready when a chopstick or knife slides in easily, but the meat still holds its shape. Avoid a hard boil, which can make the pork greasy and less delicate.
    5. Rest before slicing. ⏳ Transfer the pork to a cutting board and let it rest for 10 minutes. This short resting period helps retain its flavorful juices.
    6. Prepare the wraps. Rinse and dry napa cabbage or lettuce leaves. Arrange them on a platter with kimchi, ssamjang, sliced garlic, chilies, rice, and salted shrimp sauce.
    7. Slice and serve. 🥢 Slice the pork belly against the grain into thin, bite-sized pieces. To assemble a bossam wrap, layer a cabbage leaf with pork, kimchi, a small spoonful of ssamjang, and rice if desired. Fold, wrap, and enjoy immediately.

    🌿 Health Benefits and Practical Bossam Tips

    Bossam can be a wonderfully balanced meal when served with plenty of vegetables. Pork provides protein, iron, zinc, and B vitamins, while napa cabbage, lettuce, garlic, and kimchi add fiber and valuable plant nutrients. Fermented kimchi may also support a diverse gut microbiome, although it can be high in sodium.

    • Choose quality pork: Pork belly is classic, but pork shoulder offers a leaner, equally flavorful alternative.
    • Do not skip the doenjang: Korean soybean paste adds deep umami and helps create the signature bossam aroma.
    • Serve pork warm: Bossam tastes best when the slices are warm and tender, paired with cool, crisp vegetables.
    • Balance the richness: Add fresh radish kimchi, cucumber sticks, or perilla leaves for extra freshness.

    ❓ Bossam FAQ

    What is the best cut of pork for bossam?

    Pork belly is the traditional and most popular cut for bossam because its layers of fat and meat become buttery when simmered. For a less rich option, use pork shoulder (Boston butt) and simmer it until fork-tender.

    Can I make bossam ahead of time?

    Yes. Cook the pork up to two days ahead, cool it in some of its cooking liquid, and refrigerate it in an airtight container. Reheat gently in the broth or steam slices briefly before serving. Prepare fresh cabbage leaves and wraps just before eating.

    What can I substitute for doenjang in bossam?

    The closest substitute is Japanese miso paste, preferably a darker variety. Use the same amount, but expect a slightly sweeter and milder flavor. Doenjang remains the best choice for an authentic Korean bossam taste.

    Do I need coffee for Korean boiled pork belly?

    No, but coffee is a traditional home-cooking trick that can help reduce porky aromas and add subtle depth. Use instant coffee, brewed coffee, or simply omit it if preferred; ginger, garlic, and doenjang will still create a delicious broth.

    What do you eat with bossam?

    Bossam is typically served with napa cabbage kimchi, ssamjang, salted shrimp sauce, garlic, green chilies, steamed rice, and sometimes oysters. Freshly made kimchi and radish kimchi are especially delicious partners.

    🥬 Recommended Ingredients

    Bring authentic Korean flavor to your table with fresh pork belly, quality doenjang, ssamjang, and vibrant napa cabbage kimchi.

    👉 Shop Fresh Ingredients on Amazon

    🍲 Recommended Kitchen Tools

    A sturdy Dutch oven or large stockpot, sharp slicing knife, and serving platter make homemade bossam easier, neater, and more enjoyable.

    👉 Check Out Essential Cooking Tools on Amazon

    * Disclaimer: As an Amazon Associate, I earn from qualifying purchases at no additional cost to you.

    TAGS: #Bossam, #KoreanFood, #PorkBelly, #KoreanRecipe, #Kimchi

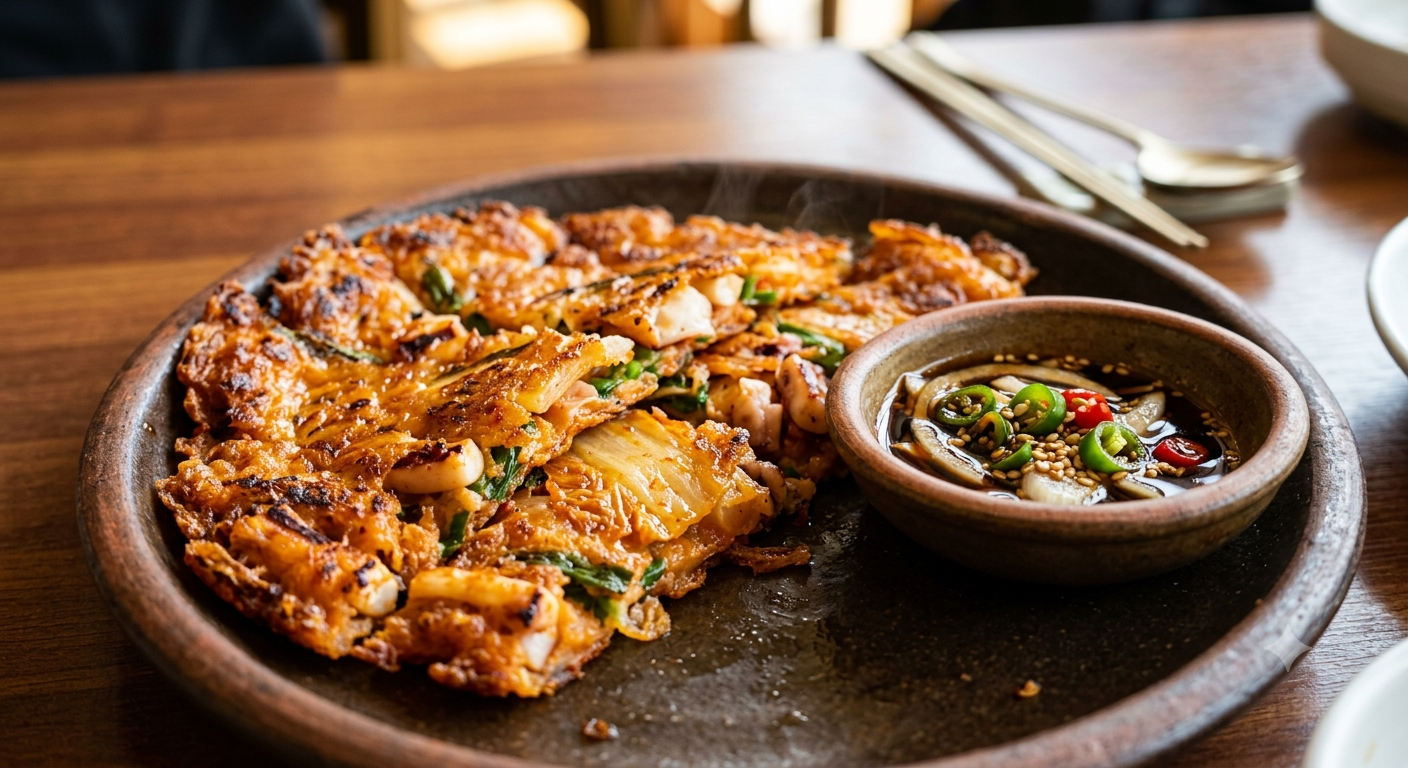
  • Kimchi Pancake: Crispy Korean Kimchi Jeon 🥞

    Kimchi Pancake: Crispy Korean Kimchi Jeon 🥞

    Kimchi Pancake: Crispy Korean Kimchi Jeon 🥞

    Few dishes turn leftover kimchi into something as irresistible as a Kimchi Pancake. Known in Korea as kimchi jeon, this savory, crisp-edged pancake is tangy, spicy, deeply satisfying, and ready in minutes. With fermented kimchi, a simple flour batter, and a hot skillet, you can create a comforting Korean classic that works as an appetizer, snack, brunch dish, or quick weeknight meal.

    📜 The History of Kimchi Jeon

    Kimchi jeon comes from Korea’s beloved tradition of jeon: pan-fried savory fritters or pancakes made with vegetables, seafood, meat, or leftovers folded into a flour-and-egg batter. Kimchi, Korea’s iconic fermented cabbage condiment, has been a household staple for centuries. As kimchi ripens, it develops a sharper, tangier flavor that is especially delicious when cooked.

    Home cooks traditionally made kimchi pancakes as a practical way to use well-fermented kimchi and its flavorful juice. Today, this popular Korean street-food favorite is enjoyed worldwide, often paired with a cold drink, rice, or a simple soy-vinegar dipping sauce. Its appeal is simple: crispy outside, tender inside, and packed with bold umami flavor.

    🛒 Ingredients for an Easy Kimchi Pancake

    • 1 cup well-fermented napa cabbage kimchi, chopped
    • 2 tablespoons kimchi juice
    • ¾ cup all-purpose flour
    • ½ cup cold water, plus more if needed
    • 1 large egg
    • 2 scallions, thinly sliced
    • ½ teaspoon sugar
    • ¼ teaspoon salt
    • 2 to 3 tablespoons neutral oil, such as avocado, canola, or vegetable oil
    • Optional: ½ cup cooked shrimp, squid, pork belly, or canned tuna

    Quick Dipping Sauce 🥣

    • 1 tablespoon soy sauce
    • 1 tablespoon rice vinegar
    • ½ teaspoon sesame oil
    • ½ teaspoon sesame seeds
    • Optional: sliced scallion or a pinch of gochugaru Korean chili flakes

    🍳 How to Make Kimchi Pancake Step by Step

    1. Prepare the kimchi. Chop the kimchi into bite-size pieces. Do not discard the juice: it gives the batter its signature bright red color and tangy depth.
    2. Make the batter 🥄. In a medium bowl, whisk together flour, cold water, egg, sugar, salt, and kimchi juice until mostly smooth. The batter should be pourable but not watery. Fold in chopped kimchi, scallions, and any optional seafood or protein.
    3. Heat the pan 🔥. Place a nonstick or well-seasoned cast-iron skillet over medium-high heat. Add 1½ tablespoons oil and let it heat until it shimmers. A properly hot pan is the secret to a crunchy pancake.
    4. Cook the first side. Pour in the batter and spread it into a thin, even round, about 8 to 9 inches wide. Press down gently with a spatula so the kimchi makes contact with the pan. Cook for 4 to 5 minutes, until the bottom is golden brown and crisp.
    5. Flip carefully 🔄. Slide the pancake onto a plate, place the skillet upside down over the plate, then flip both together. Add the remaining oil around the edges before returning the pancake to the heat. This helps create a restaurant-style crispy finish.
    6. Finish and serve. Cook the second side for 3 to 4 minutes until browned and firm in the center. Transfer to a cutting board, slice into wedges, and serve hot with dipping sauce.

    🌿 Health Benefits and Smart Cooking Tips

    Kimchi brings more than flavor. Because it is fermented, it may contain beneficial probiotics that support gut health, although high heat can reduce live cultures during cooking. Kimchi is also a source of vitamins A, C, and K, while scallions add antioxidants and fresh flavor. For a more balanced meal, serve your pancake with cucumber salad, steamed edamame, or a bowl of rice and protein.

    • Use older kimchi: Sour, mature kimchi makes the best kimchi pancake because its flavor stands up to heat.
    • Keep it thin: A thinner pancake develops more crispy surface area than a thick one.
    • Use enough oil: This is pan-fried comfort food; a generous slick of oil creates the classic crunchy edges.
    • Make it gluten-free: Replace all-purpose flour with a gluten-free all-purpose blend or Korean pancake mix labeled gluten-free.
    • Control sodium: Kimchi and soy sauce can be salty, so taste before adding extra salt to the batter or sauce.

    ❓ Kimchi Pancake FAQ

    Can I make kimchi pancakes ahead of time?

    Kimchi pancakes taste best immediately after cooking, when the edges are crisp. You can prepare the batter up to 12 hours ahead and refrigerate it in an airtight container. Stir well before cooking. Reheat cooked pancakes in a lightly oiled skillet or air fryer rather than a microwave.

    What is the best kimchi for kimchi jeon?

    Well-fermented napa cabbage kimchi is the traditional and best choice. Look for kimchi that smells pleasantly sour and has plenty of red, flavorful juice. Fresh kimchi can work, but the pancake will be milder and less tangy.

    Can I make a vegan kimchi pancake?

    Yes. Omit the egg and confirm your kimchi is vegan, as some brands contain fish sauce or salted shrimp. Add an extra tablespoon of flour and a little water if needed to help the batter bind.

    Why is my kimchi pancake not crispy?

    The pan may not be hot enough, the batter may be too thick, or there may be too little oil. Cook over medium-high heat, spread the batter thinly, and avoid moving it too early. Let the bottom brown fully before flipping.

    What can I serve with Korean kimchi pancakes?

    Serve kimchi jeon with soy-vinegar dipping sauce, Korean pickles, rice, chilled beer, or sparkling water. For a full Korean-inspired meal, pair it with doenjang soup, spicy cucumber salad, or grilled bulgogi.

    Recommended Ingredients 🥬

    Bring authentic Korean flavor to your kitchen with ripe fermented kimchi, gochugaru, toasted sesame oil, and quality soy sauce. Choose fresh, flavorful pantry staples for the most delicious kimchi jeon.

    👉 Shop Fresh Ingredients on Amazon

    Recommended Kitchen Tools 🍳

    A reliable nonstick skillet or seasoned cast-iron pan, a wide spatula, and a sturdy mixing bowl make flipping and crisping your Korean pancakes much easier.

    👉 Check Out Essential Cooking Tools on Amazon

    * Disclaimer: As an Amazon Associate, I earn from qualifying purchases at no additional cost to you.

    TAGS: #KimchiPancake, #KimchiJeon, #KoreanFood, #EasyRecipes, #FermentedFoods

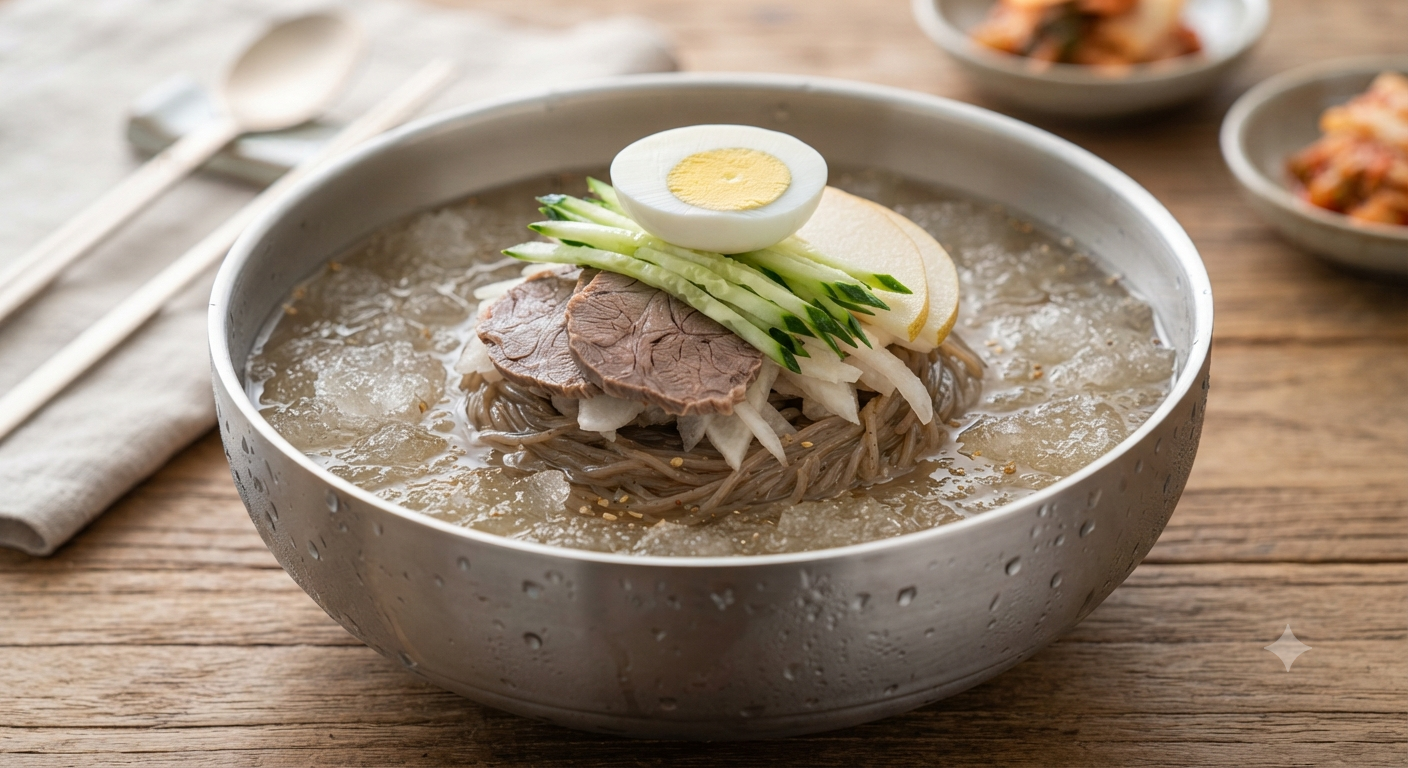
  • Naengmyeon: Refreshing Korean Cold Noodles for Hot Summer Days 🍜❄️

    Naengmyeon: Refreshing Korean Cold Noodles for Hot Summer Days 🍜❄️

    Naengmyeon: Refreshing Korean Cold Noodles for Hot Summer Days 🍜❄️

    Few dishes deliver summer relief as beautifully as naengmyeon, Korea’s famously icy cold noodle soup. With chewy buckwheat noodles, a brisk tangy broth, crisp cucumber, tender beef, and a cool half-boiled egg, this dish is a complete sensory reset in a bowl. One slurp brings savory, sour, sweet, and deeply refreshing flavors together—perfect for humid afternoons or whenever you crave something lighter than a steaming bowl of soup.

    📜 The History of Naengmyeon

    Naengmyeon originated in northern Korea, particularly the regions around Pyongyang and Hamhung. Historically, it was enjoyed during winter rather than summer, when naturally chilled broth and ice were readily available. Pyongyang naengmyeon is known for its clear, mild beef-based broth and buckwheat noodles, while Hamhung naengmyeon often features chewy potato or sweet-potato starch noodles tossed in a spicy red sauce.

    Today, mul naengmyeon—the chilled broth version—is beloved across Korea and around the world. Restaurants often serve it in a cold metal bowl with floating ice, making it one of the most iconic Korean summer foods.

    🥣 Easy Mul Naengmyeon Recipe

    This home-friendly recipe makes two satisfying servings of classic Korean cold noodle soup. For the most authentic result, chill every component thoroughly before assembling.

    Ingredients

    • 2 portions Korean naengmyeon noodles (buckwheat or starch noodles)
    • 4 cups chilled beef broth or Korean naengmyeon broth
    • 2 tablespoons Korean radish kimchi brine or dongchimi liquid
    • 1 tablespoon rice vinegar
    • 1 to 2 teaspoons sugar, to taste
    • 1 teaspoon soy sauce
    • 1 small cucumber, thinly julienned
    • 1 small Korean radish or daikon, thinly sliced and lightly pickled
    • 4 thin slices cooked beef brisket or bulgogi-style beef
    • 1 hard-boiled egg, halved
    • 1 tablespoon toasted sesame seeds
    • Yellow mustard and extra vinegar, for serving
    • Ice cubes, optional but highly recommended

    👩‍🍳 Step-by-Step: How to Make Naengmyeon

    1. Chill the broth thoroughly ❄️
      In a large bowl or jug, combine the beef broth, kimchi brine, rice vinegar, sugar, and soy sauce. Stir until the sugar dissolves. Taste and adjust for a balanced sweet-sour-savory flavor. Refrigerate for at least 1 hour, or place in the freezer for 20 to 30 minutes until very cold but not frozen solid.
    2. Prepare the toppings 🥒
      Julienne the cucumber and slice the pickled radish. Arrange the cooked beef, egg halves, sesame seeds, and toppings on a plate. Keep everything chilled until serving.
    3. Cook the noodles carefully 🍜
      Bring a large pot of water to a rapid boil. Add the naengmyeon noodles and cook according to the package instructions, usually 2 to 4 minutes. Stir gently to prevent the noodles from clumping.
    4. Rinse until icy cold 💧
      Drain the noodles immediately and rinse them under cold running water. Rub and lift the noodles with your hands to remove excess starch. Finish with an ice-water rinse for the signature springy texture.
    5. Shape the noodle nest
      Divide the drained noodles between two deep bowls. Twist them into neat mounds, which makes the dish easier to eat and gives it a restaurant-style presentation.
    6. Assemble and serve ✨
      Pour the ice-cold broth over the noodles. Top with cucumber, pickled radish, beef, egg, and sesame seeds. Add a few ice cubes if desired. Serve immediately with yellow mustard and vinegar on the side.

    🌿 Health Benefits and Smart Serving Tips

    Naengmyeon can be a refreshing balanced meal when made with quality ingredients. Buckwheat noodles may provide fiber, magnesium, and plant compounds, while cucumber and radish add hydration and crunch. Lean beef contributes protein, and the egg offers satisfying nutrients.

    • Watch the sodium: Packaged broth can be salty, so dilute it with unsalted beef broth or cold water if needed.
    • Use real buckwheat noodles: Look for noodles with a higher buckwheat content for a nuttier flavor and more traditional character.
    • Make it vegetarian: Replace beef broth with chilled kombu-shiitake stock and omit the beef topping.
    • Serve immediately: The noodles soften as they sit, so assemble only when everyone is ready to eat.

    ❓ Naengmyeon FAQ

    What is the difference between mul naengmyeon and bibim naengmyeon?

    Mul naengmyeon is served in a cold, clear, tangy broth. Bibim naengmyeon is a brothless version mixed with a spicy gochujang-based sauce. Both use chewy Korean cold noodles, but mul naengmyeon is more cooling and subtly flavored.

    What are the best noodles for authentic naengmyeon?

    Traditional Pyongyang-style naengmyeon uses thin noodles made with buckwheat flour, often blended with starch for elasticity. Hamhung-style noodles are typically made with potato or sweet-potato starch and have a chewier bite. Choose buckwheat noodles for a milder, nuttier bowl.

    Can I make naengmyeon broth ahead of time?

    Yes. The broth is ideal for making ahead because it needs to be very cold. Prepare it up to two days in advance, store it in an airtight container, and keep it refrigerated. For an extra-frosty bowl, partially freeze the broth until small ice crystals form.

    Can I substitute the beef in naengmyeon?

    Absolutely. Try sliced chicken, tofu, roasted mushrooms, or skip the protein entirely. A vegetarian broth with cucumber, radish, pear, and egg still creates a deliciously authentic-style cold noodle bowl.

    Why are my naengmyeon noodles too soft?

    Overcooking is usually the cause. Cook the noodles only until just tender, then rinse them aggressively in cold water. The ice-water rinse is essential for preserving the firm, bouncy naengmyeon texture.

    🥬 Recommended Ingredients

    Bring authentic Korean flavor to your table with premium buckwheat noodles, chilled naengmyeon broth, toasted sesame seeds, and quality kimchi brine.

    👉 Shop Fresh Ingredients on Amazon

    🍲 Recommended Kitchen Tools

    A deep noodle bowl, fine-mesh strainer, large stockpot, and sharp julienne slicer make homemade naengmyeon faster, cleaner, and more enjoyable to prepare.

    👉 Check Out Essential Cooking Tools on Amazon

    * Disclaimer: As an Amazon Associate, I earn from qualifying purchases at no additional cost to you.

    TAGS: #Naengmyeon, #KoreanFood, #ColdNoodles, #SummerRecipes, #KoreanCuisine

  • Hotteok: Korean Sweet Pancakes with Cinnamon Sugar Filling 🥞

    Hotteok: Korean Sweet Pancakes with Cinnamon Sugar Filling 🥞

    Hotteok: Korean Sweet Pancakes with Cinnamon Sugar Filling 🥞

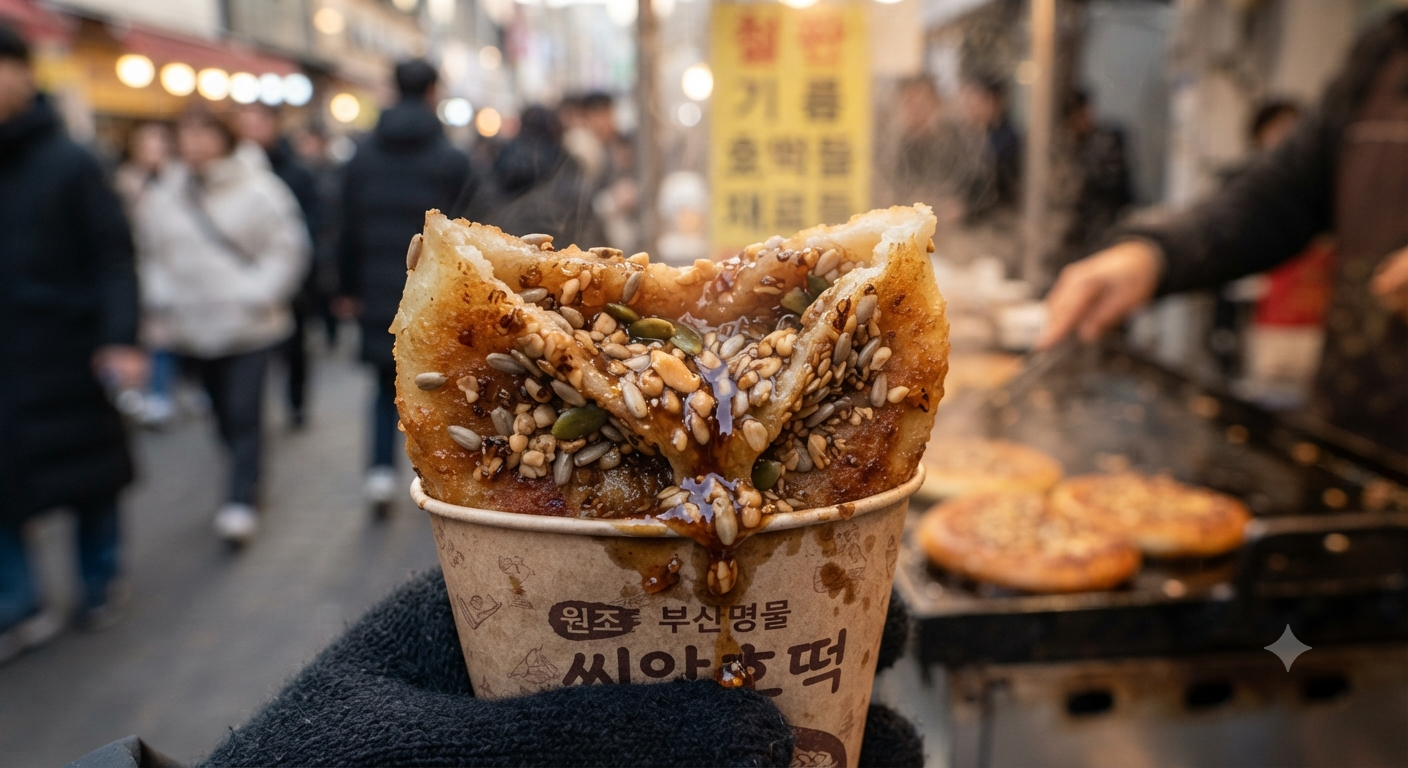
    Few street-food aromas are as irresistible as hotteok: yeasty dough sizzling on a griddle, a caramel-like filling melting inside, and crisp golden edges waiting to be torn open. These beloved Korean sweet pancakes are warm, chewy, nutty, and wonderfully comforting—especially on a cool afternoon..

    This easy homemade hotteok recipe recreates the classic version sold from street carts across Seoul, Busan, and Korean markets worldwide. Each pancake is filled with brown sugar, cinnamon, and crunchy nuts, then pressed flat and pan-fried until beautifully crisp.

    📜 The History of Hotteok

    Hotteok (호떡) has a fascinating multicultural history. Food historians commonly trace its origins to Chinese merchants who arrived in Korea during the late nineteenth century. The earliest versions were savory, but Korean cooks gradually adapted the dough and fillings to local tastes. Over time, hotteok became sweeter, more fragrant, and more closely associated with winter street food.

    Today, traditional cinnamon brown sugar hotteok remains the most popular variety, although modern vendors also offer fillings such as red bean paste, mozzarella cheese, vegetables, seeds, and honey. In Korea, hotteok is especially cherished during chilly weather, when it is served piping hot in a small paper cup or napkin.

    🛒 Ingredients for Classic Korean Hotteok

    • 2 cups all-purpose flour
    • 2 tablespoons granulated sugar
    • 1 teaspoon instant dry yeast
    • 1/2 teaspoon salt
    • 3/4 cup warm milk or warm water
    • 1 tablespoon neutral oil, plus more for pan-frying
    • 1/2 cup packed brown sugar
    • 1 teaspoon ground cinnamon
    • 1/3 cup chopped walnuts, peanuts, pecans, or sunflower seeds

    Yield: 6 hotteok pancakes | Prep time: 20 minutes | Rise time: 1 hour | Cook time: 15 minutes

    🍳 How to Make Hotteok Step by Step

    1. Make the dough 🥣
      In a large bowl, combine flour, sugar, yeast, and salt. Pour in the warm milk or water and 1 tablespoon oil. Stir until a sticky dough forms. The dough should be soft and slightly tacky; avoid adding too much extra flour.
    2. Let it rise ⏳
      Cover the bowl with a clean kitchen towel or plastic wrap. Leave it in a warm place for about 60 minutes, or until doubled in size.
    3. Prepare the filling 🌰
      Mix the brown sugar, cinnamon, and chopped nuts in a small bowl. For a more traditional street-food texture, use chopped peanuts or sunflower seeds.
    4. Divide and fill the dough ✋
      Lightly oil your hands. Gently deflate the risen dough and divide it into 6 equal portions. Flatten one portion into a small round, place about 1 tablespoon of filling in the center, then gather and pinch the edges tightly to seal.
    5. Pan-fry the hotteok 🔥
      Heat a nonstick skillet over medium-low heat and add a thin layer of oil. Place one filled dough ball seam-side down in the pan. Cook for about 30 seconds, then use a spatula or hotteok press to flatten it into a thick pancake.
    6. Cook until golden and molten ✨
      Fry for 2 to 3 minutes per side until golden brown and crisp. The sugar inside should melt into a glossy syrup. Repeat with the remaining dough, adding a little oil as needed.
    7. Serve safely and warm ☕
      Rest the pancakes for 1 to 2 minutes before eating. The filling becomes extremely hot, so take care with the first bite.

    🌿 Health Benefits and Practical Tips

    Hotteok is a treat rather than an everyday health food, but it can still be made with thoughtful ingredients. Nuts and seeds add plant-based protein, healthy fats, magnesium, and vitamin E. Cinnamon contributes a naturally warm flavor, allowing you to use less sugar without losing richness.

    • Use whole-wheat flour: Replace up to half of the all-purpose flour with whole-wheat flour for more fiber.
    • Reduce the sweetness: Use 1/3 cup brown sugar instead of 1/2 cup for a less sweet filling.
    • Keep the heat moderate: Medium-low heat prevents the dough from browning before the sugar melts.
    • Oil your hands: This sticky dough is much easier to shape with lightly oiled hands than floured hands.
    • Enjoy fresh: Freshly cooked hotteok has the best contrast of crisp exterior and soft, syrupy center.

    ❓ Hotteok FAQ: Common Questions Answered

    What is hotteok made of?

    Classic hotteok is made with a yeast-based flour dough filled with brown sugar, cinnamon, and chopped nuts or seeds. It is pan-fried and pressed into a round pancake.

    Can I make hotteok dough ahead of time?

    Yes. After mixing the dough, cover it and refrigerate it for up to 12 hours. Let it sit at room temperature for 30 to 45 minutes before shaping so it becomes easier to handle.

    What can I use instead of nuts in hotteok?

    Sunflower seeds, pumpkin seeds, shredded coconut, sesame seeds, or extra brown sugar are excellent nut-free substitutions. For a nut-free household, always check that your ingredients are not processed alongside nuts.

    Why is my hotteok dough too sticky?

    Hotteok dough is naturally sticky because that moisture creates its signature chewy texture. Use a small amount of oil on your hands and work surface rather than adding lots of flour, which can make the pancakes dense.

    Can I reheat leftover Korean sweet pancakes?

    Yes. Reheat hotteok in a lightly oiled skillet over low heat for 2 to 3 minutes per side. Avoid microwaving if possible, as it can make the exterior soft instead of crisp.

    🥜 Recommended Ingredients

    Bring authentic Korean street-food flavor to your kitchen with fragrant cinnamon, rich brown sugar, quality yeast, and fresh nuts or seeds for the perfect molten hotteok filling.

    👉 Shop Fresh Ingredients on Amazon

    🍳 Recommended Kitchen Tools

    A reliable nonstick skillet, sturdy spatula, mixing bowl, and pancake press make shaping and frying homemade hotteok easier, neater, and more consistent.

    👉 Check Out Essential Cooking Tools on Amazon

    * Disclaimer: As an Amazon Associate, I earn from qualifying purchases at no additional cost to you.

    TAGS: #Hotteok, #KoreanStreetFood, #KoreanDessert, #SweetPancakes, #AsianRecipes

  • Galbijjim: Korean Braised Short Ribs with Deep, Glossy Flavor 🍖

    Galbijjim: Korean Braised Short Ribs with Deep, Glossy Flavor 🍖

    Galbijjim: Korean Braised Short Ribs with Deep, Glossy Flavor 🍖

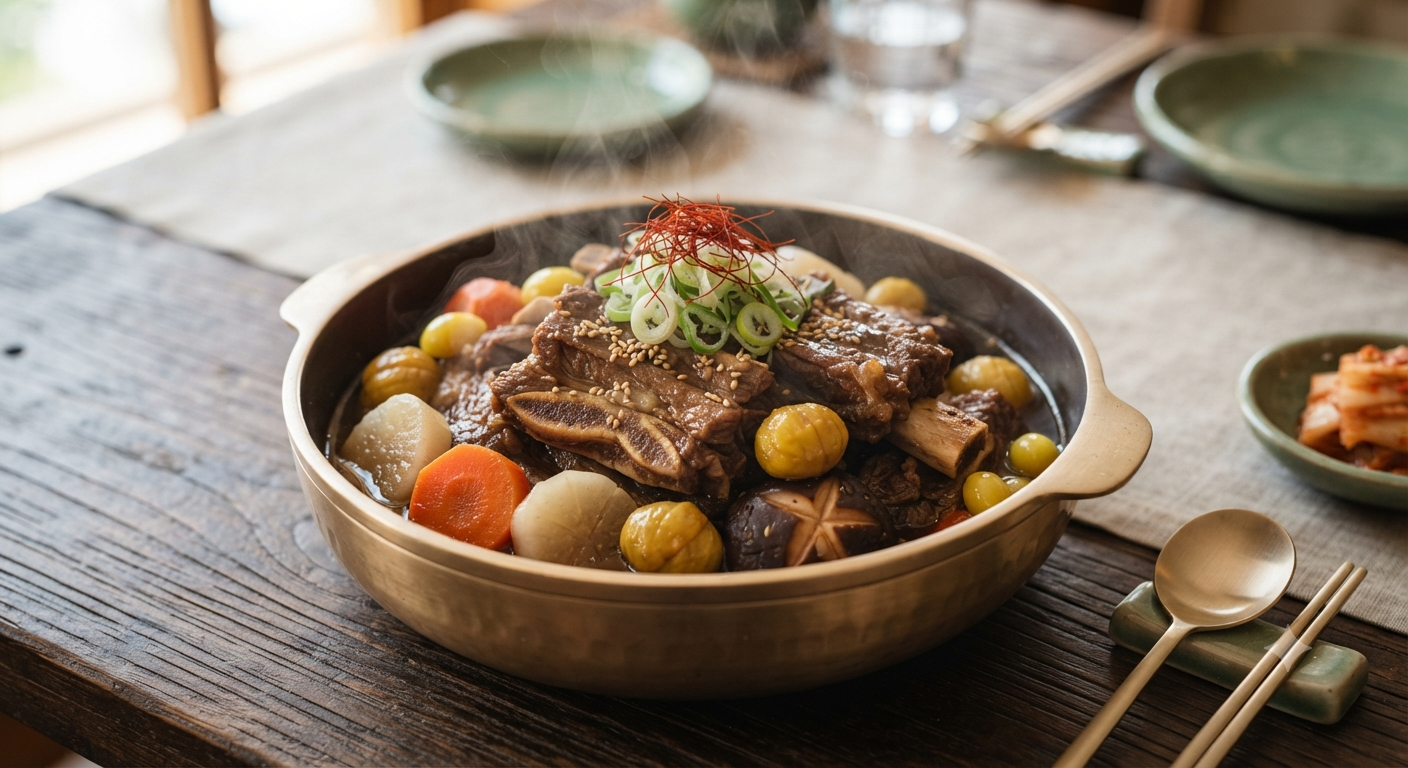
    Rich, tender, and gently sweet-savory, Galbijjim is one of Korea’s most comforting celebration dishes. This luxurious Korean braised short rib recipe slowly cooks beef until it is spoon-tender, surrounded by soft potatoes, carrots, radish, and a glossy soy-based sauce. Whether you are planning a festive family dinner or exploring authentic Korean home cooking, Galbijjim brings impressive flavor to the table without complicated techniques.

    📜 The History of Galbijjim

    Galbi means ribs, while jjim refers to a Korean cooking method in which ingredients are steamed or braised. Galbijjim has long been associated with special occasions in Korea, including weddings, birthdays, holidays, and ancestral gatherings. Historically, beef was a valuable ingredient, so a generous bowl of braised ribs represented hospitality and abundance.

    Traditional Korean Galbijjim is made with beef short ribs simmered in a balanced sauce of soy sauce, garlic, sesame oil, fruit, and aromatics. Korean pear is especially prized because it adds delicate sweetness while naturally helping tenderize the meat. Today, this beloved dish appears everywhere from Seoul family kitchens to Korean barbecue restaurants worldwide.

    🥘 Authentic Galbijjim Recipe

    Ingredients

    • 3 pounds bone-in beef short ribs, preferably Korean-cut flanken or English-cut ribs
    • 1 medium Korean radish or daikon, cut into large chunks
    • 2 medium carrots, cut into thick rounds
    • 2 medium potatoes, peeled and cut into large pieces
    • 1 small onion, cut into wedges
    • 6 dried jujubes (Korean dates), optional
    • 2 tablespoons toasted sesame seeds, for serving

    For the Braising Sauce

    • ¾ cup low-sodium soy sauce
    • ⅓ cup brown sugar or Korean rice syrup
    • ½ Korean pear, grated or blended
    • 6 garlic cloves, minced
    • 1 tablespoon grated fresh ginger
    • 2 tablespoons mirin or rice wine
    • 1 tablespoon toasted sesame oil
    • 2½ cups water or unsalted beef stock
    • ½ teaspoon black pepper

    👩‍🍳 Step-by-Step Galbijjim Instructions

    1. Soak the ribs 💧: Place the short ribs in a large bowl, cover with cold water, and soak for 30 minutes. Drain and rinse well. This classic Korean step helps remove excess blood and creates a cleaner-tasting braising sauce.
    2. Parboil for a clear broth 🔥: Add ribs to a large pot and cover with fresh water. Bring to a boil for 8 to 10 minutes, then drain. Rinse the ribs and carefully wash away any foam from the pot.
    3. Mix the sauce 🥣: In a bowl, whisk together soy sauce, brown sugar, grated Korean pear, garlic, ginger, mirin, sesame oil, water or stock, and black pepper. The pear provides a signature natural sweetness and tenderizing effect.
    4. Begin the braise 🍲: Return the cleaned ribs to the pot and pour in the sauce. Bring to a gentle boil, then reduce heat to low. Cover partially and simmer for 60 minutes, occasionally skimming off fat.
    5. Add the vegetables 🥕: Add radish, carrots, potatoes, onion, and jujubes if using. Continue simmering for 35 to 45 minutes, until the ribs are fork-tender and the vegetables are soft but intact.
    6. Reduce and finish ✨: If the sauce seems thin, uncover the pot and simmer for 10 to 15 minutes until glossy and slightly reduced. Taste and adjust with a little soy sauce for saltiness or sugar for sweetness.
    7. Serve warm 🍚: Transfer Galbijjim to a large serving bowl, spoon the sauce over the ribs and vegetables, and finish with toasted sesame seeds. Serve with steamed rice, kimchi, and crisp Korean side dishes.

    🌿 Health Benefits and Practical Tips

    Galbijjim is a satisfying source of protein, iron, zinc, and vitamin B12, nutrients that support energy and normal red blood cell production. Carrots and radish add fiber and antioxidants, while garlic and ginger contribute bold flavor without needing excessive oil.

    For a lighter version, chill the finished dish overnight and remove the hardened fat before reheating. Choose low-sodium soy sauce to better manage salt levels, and serve the rich ribs with plenty of vegetables and rice. Galbijjim often tastes even better the next day because the flavors have time to deepen.

    ❓ Galbijjim FAQ

    What is the best cut of beef for Galbijjim?

    Bone-in beef short ribs are the best choice because their connective tissue becomes tender and flavorful during slow braising. Korean-cut flanken ribs cook more quickly, while thick English-cut short ribs deliver a meatier, restaurant-style result.

    Can I make Galbijjim ahead of time?

    Yes. Galbijjim is an excellent make-ahead Korean dish. Prepare it up to two days in advance, refrigerate it in an airtight container, then gently reheat on the stovetop. Add a splash of water or stock if the sauce becomes too thick.

    What can I use instead of Korean pear?

    A sweet apple, such as Fuji or Honeycrisp, is the closest substitute. You can also use kiwi in a very small amount, but use caution: kiwi tenderizes beef quickly and can make the meat mushy if left too long.

    Can Galbijjim be made in a pressure cooker?

    Yes. Pressure-cook the cleaned ribs with the sauce for about 35 minutes, then release pressure naturally. Add the vegetables and cook for an additional 5 to 8 minutes. Finish uncovered to reduce the sauce if needed.

    Is Galbijjim spicy?

    Traditional Galbijjim is generally not spicy. Its flavor is savory, sweet, garlicky, and aromatic. For heat, serve it with sliced fresh chili or add a small spoonful of gochugaru, Korean red pepper flakes.

    Recommended Ingredients 🌿

    Bring authentic Korean flavor to your kitchen with fragrant sesame oil, Korean soy sauce, dried jujubes, and the freshest short ribs for a truly memorable Galbijjim.

    👉 Shop Fresh Ingredients on Amazon

    Recommended Kitchen Tools 🍲

    A heavy Dutch oven, sturdy tongs, and a fine skimmer make slow-braising Galbijjim easier, cleaner, and more enjoyable from start to finish.

    👉 Check Out Essential Cooking Tools on Amazon

    * Disclaimer: As an Amazon Associate, I earn from qualifying purchases at no additional cost to you.

    TAGS: #Galbijjim, #KoreanFood, #BraisedShortRibs, #KoreanRecipe, #ComfortFood

  • Gimbap: Korea’s Colorful, Flavor-Packed Seaweed Rice Rolls 🍙

    Gimbap: Korea’s Colorful, Flavor-Packed Seaweed Rice Rolls 🍙

    Gimbap: Korea’s Colorful, Flavor-Packed Seaweed Rice Rolls 🍙

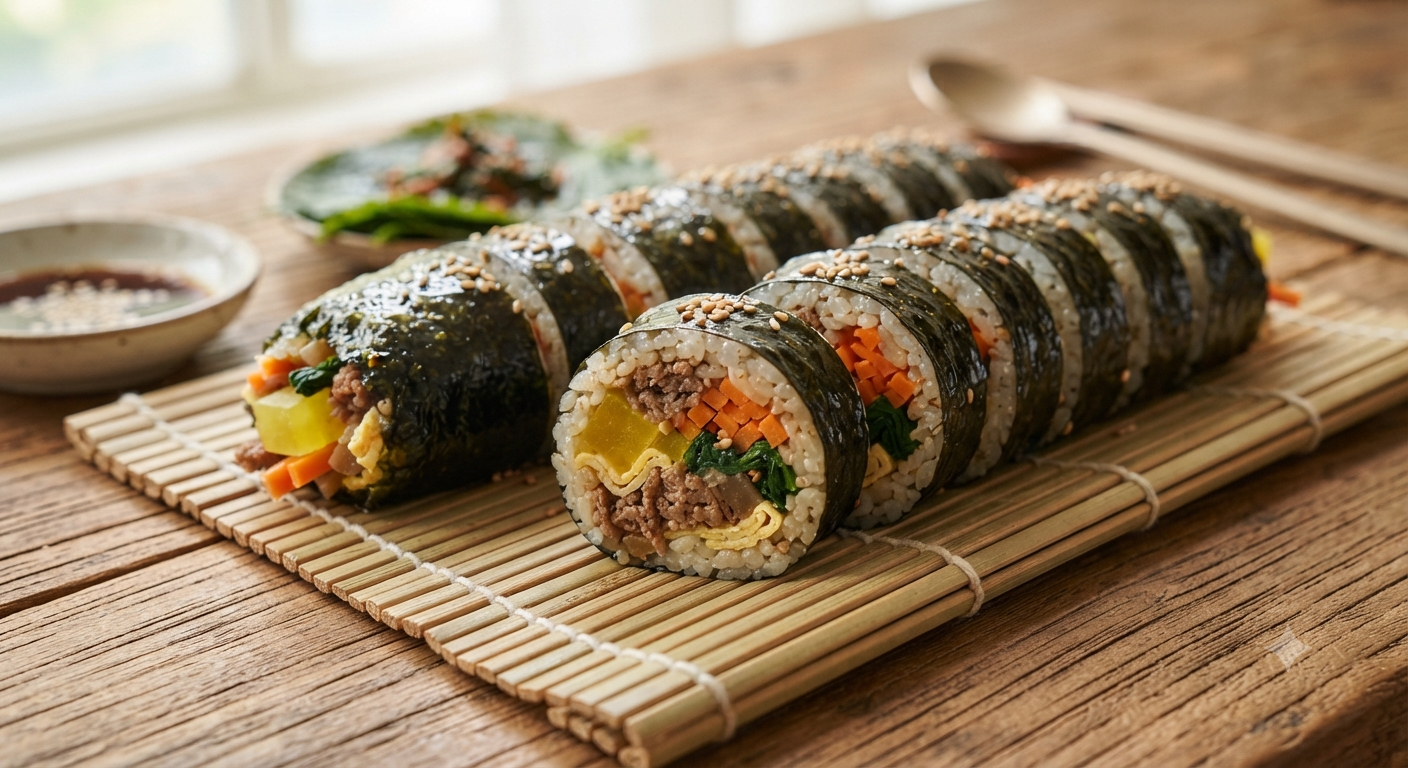
    Bright, portable, and endlessly customizable, gimbap is one of Korea’s most beloved comfort foods. Wrapped in glossy roasted seaweed and packed with seasoned rice, vegetables, egg, and savory fillings, these beautiful rolls are ideal for picnics, lunchboxes, road trips, or a quick weeknight meal. Unlike sushi, Korean gimbap is typically made with sesame-oil-seasoned rice and fully cooked ingredients, giving every bite a warm, nutty, deeply satisfying flavor.

    📜 The History and Tradition of Gimbap

    The name gimbap comes from two Korean words: gim, meaning roasted seaweed, and bap, meaning rice. While its exact origins are debated, gimbap became widely popular in Korea during the early 20th century, influenced by Japanese rolled rice dishes while evolving into a distinctly Korean favorite.

    Today, gimbap is much more than a snack. It is a familiar sight at Korean markets, school outings, hiking trips, and family gatherings. Traditional fillings often include yellow pickled radish (danmuji), spinach, carrot, egg, fish cake, and beef. Modern versions feature tuna, cheese, bulgogi, spicy pork, crab sticks, or plant-based fillings. The magic lies in the contrast: crisp vegetables, tender rice, savory seaweed, and sesame aroma in one neat, satisfying roll.

    🥢 Classic Korean Gimbap Recipe

    This easy homemade gimbap recipe makes four rolls and uses approachable ingredients while keeping the traditional flavor profile intact.

    Ingredients

    • 4 sheets roasted seaweed (gim or nori)
    • 3 cups cooked short-grain rice, slightly warm
    • 1 tablespoon sesame oil, plus more for brushing
    • 1/2 teaspoon fine sea salt
    • 1 teaspoon toasted sesame seeds
    • 2 eggs, beaten with a pinch of salt
    • 1 medium carrot, cut into thin matchsticks
    • 2 cups spinach
    • 4 strips yellow pickled radish (danmuji)
    • 4 strips imitation crab, cooked beef, fish cake, or tofu
    • 1 teaspoon neutral cooking oil

    👩‍🍳 How to Make Gimbap Step by Step

    1. 🍚 Season the rice: Place the warm cooked rice in a large bowl. Add 1 tablespoon sesame oil, salt, and sesame seeds. Gently fold until evenly seasoned. Cover with a clean, damp towel so the rice stays soft while you prepare the fillings.
    2. 🥬 Prepare the spinach: Blanch spinach in boiling water for about 30 seconds, then rinse under cold water. Squeeze out excess moisture and season lightly with a few drops of sesame oil and a pinch of salt.
    3. 🥕 Sauté the carrot: Heat oil in a skillet over medium heat. Cook carrot matchsticks for 2 to 3 minutes until slightly tender but still vibrant. Season with a small pinch of salt.
    4. 🍳 Cook the egg: Pour the beaten egg into a lightly oiled nonstick pan. Cook into a thin omelet, flip once, and transfer to a board. Slice into long strips.
    5. 🌯 Build the roll: Place one seaweed sheet shiny-side down on a bamboo rolling mat. Spread about 3/4 cup seasoned rice over the sheet, leaving a 1-inch border at the top edge. Keep the rice layer thin for an easy-to-roll gimbap.
    6. 🥢 Add the fillings: Arrange spinach, carrot, egg, pickled radish, and your chosen protein in a horizontal line across the lower third of the rice. Avoid overfilling; a balanced roll is easier to slice and eat.
    7. ✨ Roll tightly: Lift the bottom edge of the mat and roll forward, tucking the fillings in firmly. Continue rolling until sealed. Press gently along the roll to create a compact shape.
    8. 🔪 Finish and slice: Brush the outside with sesame oil and sprinkle with sesame seeds. Use a sharp knife lightly coated with sesame oil or water to cut each roll into 8 pieces. Serve immediately.

    🌿 Health Benefits and Smart Gimbap Tips

    Gimbap can be a wonderfully balanced meal, combining carbohydrates, protein, vegetables, and healthy fats. Seaweed provides minerals such as iodine, while spinach and carrots offer fiber and antioxidants. Sesame oil contributes rich flavor, so a little goes a long way. For a lighter roll, use brown rice or mixed-grain rice and choose tofu, egg, or lean beef as your protein.

    • Keep rice warm, not hot: Hot rice can make seaweed soggy, while cold rice is harder to spread.
    • Dry fillings matter: Pat vegetables and proteins dry before rolling to prevent soggy gimbap.
    • Use a sharp knife: Wipe or oil the blade between cuts for clean, attractive slices.
    • Pack it properly: Gimbap tastes best on the day it is made. Wrap whole rolls tightly before slicing if taking them on the go.

    ❓ Gimbap FAQ

    What is the difference between gimbap and sushi?

    Gimbap uses rice seasoned with sesame oil and salt, while sushi rice is usually flavored with vinegar, sugar, and salt. Gimbap also commonly contains cooked ingredients such as egg, vegetables, beef, or fish cake, whereas sushi may feature raw fish.

    Can I make gimbap ahead of time?

    Yes, but it is best eaten within several hours of making it. Prepare fillings in advance, then roll gimbap shortly before serving. If refrigerated, the rice may become firm, so allow it to sit at room temperature briefly before eating.

    What protein is best for traditional gimbap?

    Classic options include seasoned beef, fish cake, ham, egg, or imitation crab. For a quick version, canned tuna mixed with a little mayonnaise is popular. Tofu, mushrooms, or extra egg make excellent vegetarian choices.

    Can I make vegan gimbap?

    Absolutely. Replace egg and meat with marinated tofu, sautéed shiitake mushrooms, avocado, burdock root, cucumber, or extra spinach. Check that your pickled radish and seaweed are vegan-friendly.

    Why does my gimbap fall apart?

    Overfilling, using too much rice, or rolling loosely are the usual causes. Spread a thin rice layer, keep fillings centered, and use a bamboo mat to apply gentle but firm pressure as you roll.

    🥬 Recommended Ingredients

    Bring authentic Korean flavor to your kitchen with fresh roasted seaweed, toasted sesame oil, short-grain rice, and crisp yellow pickled radish for the perfect homemade gimbap.

    👉 Shop Fresh Ingredients on Amazon

    🍳 Recommended Kitchen Tools

    A reliable bamboo rolling mat, sharp chef’s knife, rice paddle, and nonstick skillet make rolling neat, restaurant-worthy gimbap much easier.

    👉 Check Out Essential Cooking Tools on Amazon

    * Disclaimer: As an Amazon Associate, I earn from qualifying purchases at no additional cost to you.

    TAGS: #Gimbap, #KoreanFood, #KoreanRecipe, #SeaweedRiceRolls, #EasyLunch